Hardscape Harmony: Building Your Aquarium’s Foundation with Rocks and Driftwood
Hello fellow aquarists! Does the thought of arranging rocks and wood in your tank leave you feeling more confused than inspired, worried you might create a cluttered mess instead of a serene underwater scene?
This guide will walk you through the entire process, covering: selecting the perfect rocks and driftwood for your vision and budget, mastering placement techniques that create depth and hide equipment, and securing your hardscape to keep your fish safe and your design intact.
I’ve spent years designing high-tech planted tanks and breeding sensitive fish, learning through trial and error how to make hardscape work beautifully.
Understanding the Role of Hardscape in Your Aquarium
Hardscape materials like rocks and driftwood do more than just make your tank look pretty-they shape the entire environment for your fish and plants. Think of hardscape as the skeleton of your aquascape, providing structure and influencing how water flows and life thrives. In my own setup, I’ve watched Shadow, my Corydoras, dart between rocks for cover, and Goldie, the Oranda, nibble on driftwood edges.
Here’s what hardscape brings to your aquarium:
- Creates natural territories and hiding spots, reducing stress for shy or territorial fish.
- Supports beneficial bacteria growth on porous surfaces, which helps break down waste.
- Anchors plants and prevents substrate from shifting over time.
- Adds visual depth and texture, turning a plain tank into a miniature ecosystem.
Balance is key; too much hardscape can cramp swimming space, while too little might leave fish feeling exposed. I always aim for a layout that offers both open areas for active swimmers and cozy nooks for bottom dwellers.
Choosing Your Hardscape Materials
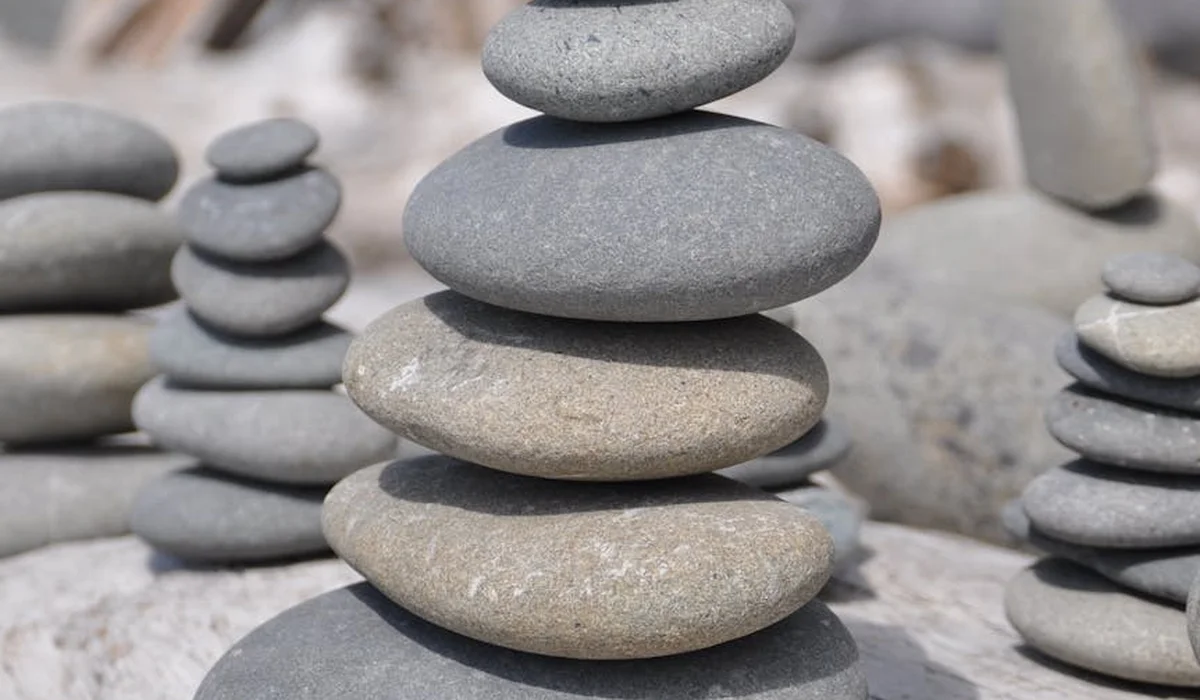
Selecting Safe and Suitable Rocks
Not all rocks are aquarium-safe-some can leach minerals that alter water chemistry or have sharp edges that harm delicate fins. Stick to inert rocks like lava rock, slate, or quartz that won’t affect your pH or hardness. I avoid limestone and sandstone because they can slowly dissolve and raise pH, which isn’t ideal for soft-water species like Bettas.
Use this simple vinegar test to check rock safety:
- Place a few drops of white vinegar on the rock’s surface.
- If it fizzes, the rock contains carbonates and may alter water parameters.
- Choose non-fizzing rocks for stable conditions.
For a 10 to 20-gallon tank, select rocks under 5 inches to avoid overcrowding. Rounded edges are safer for fish like Goldie, who love to forage without risking scale damage. Always scrub rocks with a brush and rinse thoroughly before adding them to your tank.
Picking the Perfect Driftwood
Driftwood adds a warm, natural feel and can slightly lower pH, mimicking environments for fish from soft-water habitats. Spider wood and mopani are my top picks because they’re dense, sink easily, and have intriguing shapes that create instant focal points. In my experience, Captain Fin loves perching on driftwood branches, surveying his domain. Choosing the right driftwood is crucial for both aesthetics and fish health.
Prepare driftwood properly to avoid tannins that tint water brown:
- Soak it in a bucket for 1-2 weeks, changing water daily.
- Boil for 1-2 hours to kill any bacteria and speed up waterlogging.
- Scrub off loose bark to keep debris out of your tank.
Match driftwood size to your aquarium— for a 30-gallon tank, a piece 12-18 inches long works well without dominating the space. Porous driftwood also hosts biofilm, which shrimp and some catfish enjoy grazing on. Avoid soft, rotting wood, as it can decay and foul your water over time. Before placing driftwood in your aquarium, prepare clean driftwood by scrubbing and soaking to remove dust and tannins. A quick boil or long soak helps it sink and reduces water discoloration.
Preparing Your Hardscape for the Tank

How to Clean and Prepare Rocks
Before any rock touches your aquarium, give it a thorough scrub under running water using a stiff-bristled brush. I always do this outside with a hose to avoid mess. This removes loose dirt and potential contaminants that could cloud your water or harm fish. If your decorations or rocks have algae, scrub those surfaces with the same brush to remove the algae before they go in. This helps prevent introducing extra algae into your tank.
For porous rocks like lava rock or Seiryu stone, I soak them in a bucket of water for 24 hours. Check for any color leaching or odor. If you suspect a rock might alter water chemistry, perform the vinegar test. Drip white vinegar on it; if it fizzes, it contains carbonates and can raise pH and hardness.
- Scrub vigorously with a brush and tap water.
- Soak for a day to test for stability.
- Avoid rocks with sharp edges that could injure fish like curious Corydoras.
- Boil non-porous rocks for 10-15 minutes to sterilize, but never boil geodes or layered stones as they can explode.
How to Clean and Waterlog Driftwood
New driftwood often carries tannins that tint water tea-colored. While harmless, it lowers pH slightly, which can benefit soft water species. To clean, I scrub the wood with a brush under hot water to dislodge debris. Soaking driftwood is non-negotiable to waterlog it and prevent floating. In blackwater aquariums, tannins and humic substances from driftwood color the water and contribute to a natural, enriched habitat for aquatic life.
Submerge the wood in a container with a weight on top. Change the water daily when it darkens. For dense woods like Mopani, this can take 2-3 weeks. Spider wood might only need a week. I’ve sped this up by boiling smaller pieces for 1-2 hours, which also helps sink them faster and reduces tannins.
- Scrub the surface to remove dirt and loose bark.
- Soak in a bucket until it stays submerged, checking water clarity.
- Boil if possible to sterilize and accelerate waterlogging.
- Patience is key-rushing this can lead to a floating mess in your tank.
Designing Your Aquascape Layout
Establishing a Focal Point
Your aquascape needs a visual anchor that draws the eye immediately. This could be a uniquely shaped piece of driftwood or a striking rock formation. Place the focal point off-center, following the rule of thirds, to create a more natural and engaging scene. In one of my tanks, I used a twisted Manzanita branch as the centerpiece, and it became Captain Fin’s favorite resting spot.
Choose an element with strong texture or color contrast. A dark, gnarled wood against light sand or a tall, vertical rock in a low-lying plant bed works wonders. Avoid cluttering the area around it; let it breathe so fish like Goldie can swim around without obstruction.
Creating Balance and Flow
Balance doesn’t mean symmetry. It’s about distributing visual weight so the scape feels harmonious. Use larger rocks or wood on one side and balance with smaller elements or plant mass on the other. Flow guides the viewer’s gaze smoothly across the tank, often using diagonal lines or curved arrangements.
- Lay rocks and wood in a way that mimics natural streams or forests.
- Vary heights to create depth-tall pieces in the back, shorter in front.
- Leave open swimming lanes for active fish while using hardscape to define territories.
- I often step back and squint to check if the layout feels cohesive before adding water.
Ensuring Stability and Safety
An unstable hardscape can collapse, cracking glass or injuring fish. Always test the structure by gently pressing on rocks and wood. For tall rock piles, I use aquarium-safe silicone or plastic supports buried in the substrate to lock them in place. This prevents shifts during water changes or when bottom-dwellers like Shadow burrow nearby.
File down any sharp edges on rocks with a sanding block. Ensure driftwood doesn’t have splinters that could snag fins. Position hardscape to create hiding spots without dead zones where waste accumulates. A stable setup means you can enjoy the shimmer of fish scales without worry.
- Build rock structures from the bottom up, testing each layer.
- Secure driftwood with screws or weights if it’s not fully waterlogged.
- Leave gaps for water circulation and easy cleaning.
- Regularly inspect for shifts, especially after adding new fish or equipment.
Integrating Hardscape with Plants and Fish
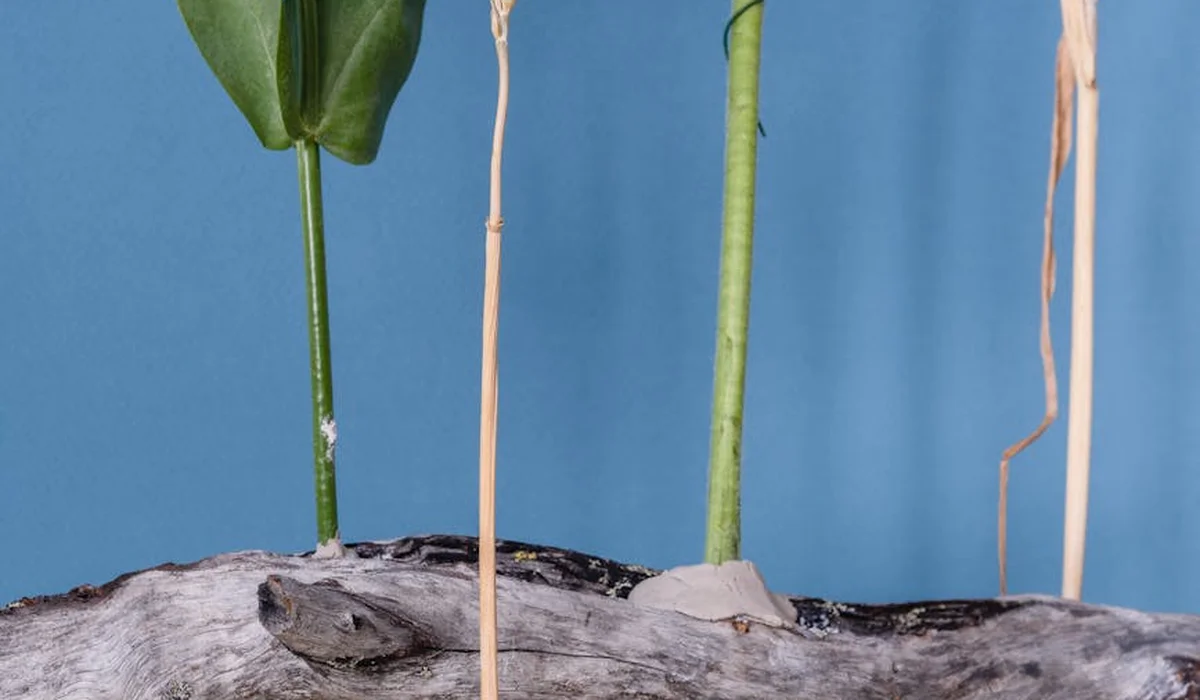
Attaching Plants to Rocks and Wood
This is where your aquascape truly comes to life. Think of your hardscape as the skeleton and the plants as the living flesh. I always use super glue gel. Yes, the cheap cyanoacrylate kind from the hardware store. It’s aquarium-safe once cured and creates an instant, durable bond.
Simply dab a small amount on the plant’s rhizome or base, press it onto the rock or wood for 30 seconds, and you’re done. It’s far easier and less messy than trying to tie things down with cotton thread that eventually rots.
For larger pieces like Java Fern or Anubias, this method is perfect. For mosses, I sometimes use a combination. A tiny dot of glue to hold it in place, then a loose wrap of dark fishing line to secure the entire clump until its tiny roots, called rhizoids, grab on.
Considering Your Fish’s Needs
Your hardscape choices directly impact your fish’s happiness and health. It’s not just about what looks good to you. You must consider who will be living in this environment.
For bottom dwellers like my Corydoras, Shadow, smooth, rounded river rocks are a must. Their delicate barbels can be damaged by sharp, jagged lava rock. I learned this the hard way years ago and now only use sand and smooth stones for any tank with catfish or loaches.
Shy or territorial fish need defined hiding spots. A stack of slate can create a perfect cave. A large piece of driftwood with an overhang offers a safe retreat. For active swimmers like Danios or Rainbowfish, your layout must prioritize open swimming lanes. Don’t clutter the center of the tank.
Always test the texture of your rocks and wood with your own hands-if it feels sharp or abrasive to you, it will be harmful to your fish. A quick file-down on any rough edges can prevent a world of trouble later.
Ongoing Hardscape Maintenance
Your work isn’t over once the hardscape is placed. Wood, especially new driftwood, will often grow a white, fuzzy biofilm. This is not dangerous. It’s a harmless bacterial bloom that shrimp and some fish love to eat.
This biofilm is a temporary buffet for your cleanup crew and will disappear on its own in a few weeks. In a new aquarium, this biofilm in a new aquarium is a normal part of the cycling process. It’s usually not dangerous and indicates the ecosystem is establishing. You can wipe it off during a water change if you find it unsightly, but it’s a sign of a healthy, establishing ecosystem.
Algae will eventually find its way onto your hardscape. For scrubbing rocks, I use a brand-new, dedicated soft-bristled toothbrush during a water change. It gets into all the nooks and crannies without scratching the surface. For wood, a quick scrub in the bucket of old tank water you’ve siphoned out does the trick. For rocks and stones, a simple step-by-step guide helps you clean them properly. This approach minimizes disturbance to beneficial bacteria and keeps your tank’s balance intact.
Be aware that certain rocks, like limestone or lace rock, can slowly dissolve over time, raising the pH and general hardness (GH) of your water. If you keep soft water fish like Tetras or Discus, stick with inert rocks like quartz, granite, or most types of lava rock to keep your water parameters stable.
Regularly check that your rock stacks are still stable, as curious fish can sometimes undermine a carefully balanced structure. A small dab of that same super glue gel between rocks can create a permanent, secure bond for peace of mind.
FAQs
What types of rocks are safe for freshwater aquariums?
Inert rocks like lava rock, slate, and quartz are safe choices as they do not alter water chemistry. Avoid carbonate-based rocks such as limestone, which can raise pH and hardness over time. Always perform a vinegar test to check for reactivity before adding any rock to your tank. This is especially important when you’re managing water hardness and alkalinity in aquariums.
How to prep rocks for aquascaping before installation?
Thoroughly scrub rocks with a stiff brush under running water to remove dirt and potential contaminants. Soak them in a bucket for 24 hours to check for color leaching or instability. For sterilization, boil non-porous rocks briefly, but avoid boiling layered stones to prevent damage. To connect this to keeping an aquarium clean, use a gravel vacuum to clean aquarium gravel effectively during regular water changes, using a gentle siphon to remove detritus without disturbing beneficial bacteria.
How to prevent rock tilting or shifting in the aquarium?
Build rock structures from the bottom up, testing each layer for stability on a solid substrate base. Use aquarium-safe silicone or plastic supports to lock tall formations in place. Regularly inspect the arrangement after maintenance to ensure it remains secure and safe for fish. This is a key step in a beginner’s step-by-step guide to building a home aquarium tank. By following a simple setup plan, new hobbyists can create stable layouts that support healthy tank life.
Can rocks affect water chemistry in an aquarium?
Yes, some rocks can leach minerals like calcium carbonate, raising pH and general hardness. Inert rocks are ideal for maintaining stable water parameters, especially in soft-water setups. Always test rocks beforehand and monitor water conditions to prevent unintended changes.
Your Aquascaping Journey Begins Now
Remember, the best aquascapes use hardscape to build a stable, functional foundation that also looks stunning. These are the core principles of aquascaping design: balance and stability, with habitat safety in mind. They guide every decision from hardscape placement to plant choice. Always prioritize creating a safe environment for your fish over purely artistic choices.
This hobby is a rewarding path of continuous learning and growth. Stay curious, keep observing your aquatic pets, and never stop refining your skills as a responsible fishkeeper.
Further Reading & Sources
- Aquarium Rock and Driftwood – SR Aquaristik
- The Elements of Aquascaping: Rocks, Driftwood & Substrates – Aquascaping Love
- AQUARIUM HARDSCAPE ROCK AND DRIFT WOOD – Lifegard Aquatics
- Hardscape – Ultum Nature Systems
- Aquarium Driftwood Used in Aquascaping: Hardscape Essentials Part 3 – Aquascaping Love
Lia is an expert in aquarium and pet fish care. Having worked in the marine industry and having cared for multiple pet fish, she has acquired first hand expertise on aquarium care, maintenance and setup. She always brings her practical expertise and science to help solve any aquarium related queries.
Aquascaping