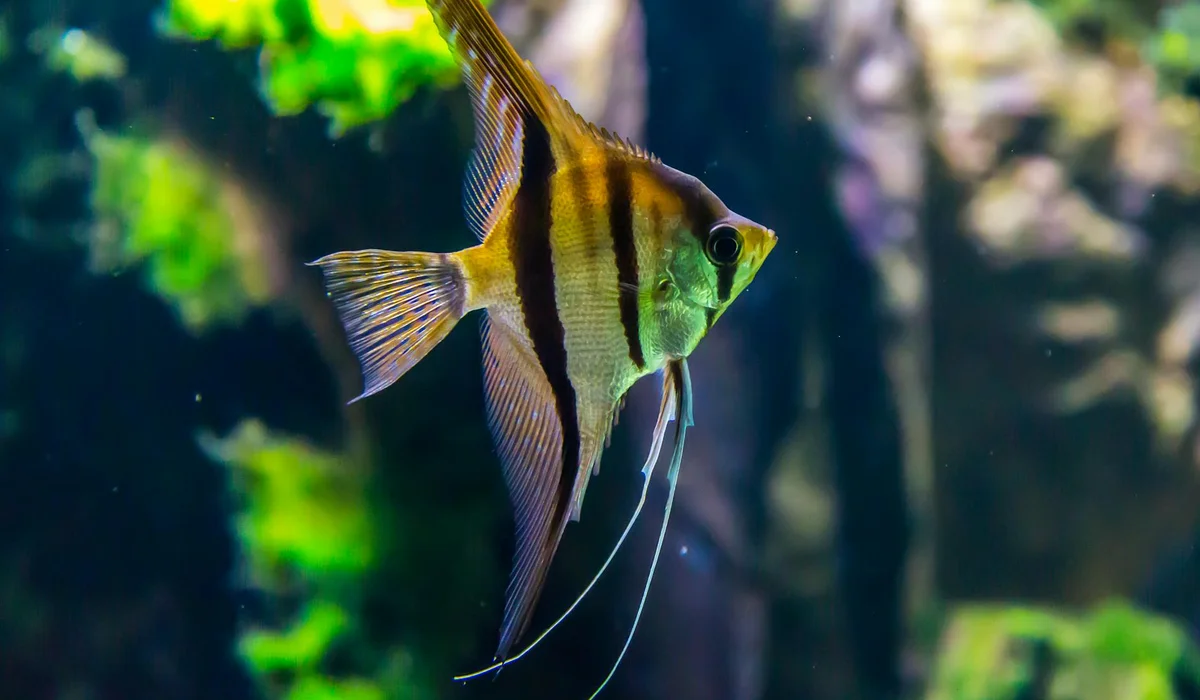
Your Battle Plan to Beat Blue-Green Algae for Good
Hello fellow aquarists. That slimy, smelly film taking over your beautiful tank is more than just an eyesore-it’s a cry for help from your aquarium’s ecosystem.
This guide gives you a clear, step-by-step strategy to eliminate cyanobacteria and restore your tank’s health. We will cover:
Accurately identifying blue-green algae and why it’s different from other aquarium pests.
The root causes that trigger an outbreak in the first place.
Safe, effective removal methods, from manual cleaning to treatment options.
Long-term prevention strategies to keep it from ever coming back.
I’ve managed this exact problem in my own high-tech planted tanks for years, learning what truly works through trial and error.
What Is Cyanobacteria and How Do You Spot It in Your Tank?
Recognizing the Look and Smell of Blue-Green Algae
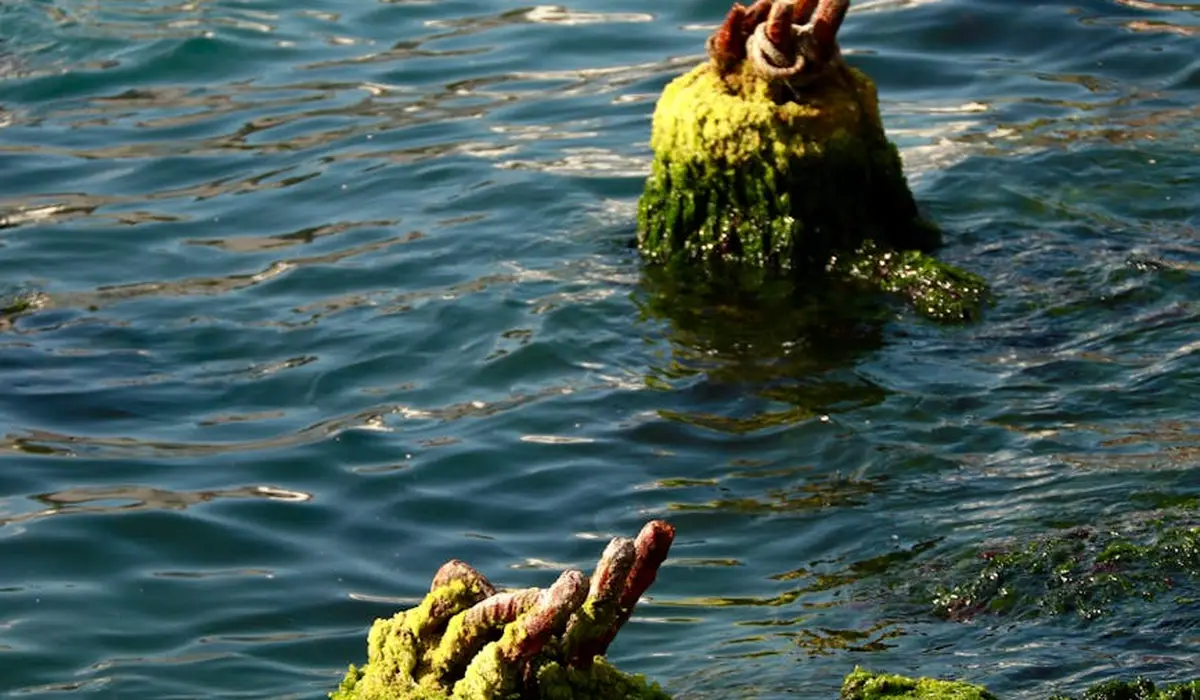
You’ll often notice cyanobacteria before you truly see it. A faint, earthy, or musty smell might be your first clue that something is off. Then you’ll spot the slime. It forms dense, paint-like mats that can cover your plants, driftwood, and substrate in a film that looks almost plastic.
Its color isn’t always blue-green. I’ve seen it in shades of dark green, blackish-brown, and even a startling purple-red. The slimy, smothering texture is its most telling feature, creating a blanket that steals light and oxygen from everything underneath.
Key Identification Features
- Slimy, Paint-like Coating: It looks like someone spilled a can of paint in your tank and it hasn’t dried.
- Earthy, Swampy Odor: A distinct musty smell is a dead giveaway when you lift the tank lid.
- Easy to Wipe Away: You can remove large sheets of it with your fingers or a siphon hose, but it grows back fast.
- Bubble Formation: The mat will often trap oxygen bubbles produced by its own photosynthesis, making it look like it’s fizzing.
Common Cyanobacteria Types in Home Aquariums
The two you’re most likely to battle are Oscillatoria and Anabaena. Oscillatoria forms those classic blue-green or blackish slimy sheets. Anabaena can look similar but sometimes appears more hairy or filamentous. Knowing the common types helps you anticipate their stubborn growth patterns and prepare for a multi-pronged attack.
Distinguishing Cyanobacteria from Other Algae
- Vs. Green Algae: Green algae is often fuzzy or hair-like and feels coarse, not slimy. It doesn’t have that strong, unpleasant odor.
- Vs. Diatoms (Brown Algae): Diatoms form a dusty film that easily wipes away and is common in new tanks. Cyanobacteria is thick, slimy, and cohesive.
- Vs. Black Beard Algae (BBA): BBA is a true algae that is wiry and incredibly difficult to remove by hand, unlike the easily peeled sheets of cyanobacteria.
What Triggers Cyanobacteria Outbreaks in Freshwater Aquariums?
Nutrient Imbalances: Nitrates and Phosphates
Cyanobacteria thrives on an imbalance. While plants struggle, cyano feasts when there’s an excess of organic waste. The most common culprit is a high phosphate-to-nitrate ratio. If your nitrate test reads zero but you have a cyano problem, you can almost bet phosphates are sky-high and creating a perfect storm.
I’ve fixed many tanks just by addressing this single imbalance. Your plants consume nitrates, but without enough, they can’t use the phosphates, leaving a feast for the slime. In planted tanks, balancing nutrients helps prevent algae growth. When nutrients are balanced, plants outcompete algae for resources.
How Excess Food and Waste Fuel Growth
- Uneaten food decomposes, releasing phosphates directly into the water column.
- Fish waste and decaying plant matter add to the organic load, overloading your biological filter.
- Overstocking your tank accelerates this process, producing more waste than your system can handle.
Every bit of excess food that sinks to the substrate becomes a direct fuel packet for a cyanobacteria bloom.
Lighting and Flow Factors
Cyanobacteria loves old, inefficient light bulbs that have shifted spectrum and lost intensity. It also capitalizes on dead spots where water circulation is poor. I always check flow patterns first; stagnant corners are almost always the starting point for an outbreak.
Using a timer for your lights is non-negotiable. Inconsistent or overly long photoperiods, especially with outdated bulbs, hand cyanobacteria an unlimited energy source.
The Role of Poor Filtration and Stagnant Water
- An undersized filter can’t process the dissolved organic compounds that cyano consumes.
- Clogged filter media becomes a nitrate factory instead of a removal tool.
- Poor tank layout with too many decorations can block flow, creating pockets of still water where cyano establishes its first colony.
Improving water movement is a free and highly effective way to disrupt the calm environment cyanobacteria needs to spread.
Immediate Steps to Remove Cyanobacteria Safely

Manual Removal Techniques
Before you add anything to the water, you need to get as much of the physical slime out as possible. Think of this like weeding a garden; you have to pull the visible weeds before you can treat the soil.
Using a Siphon and Substrate Vacuum
Your gravel vacuum is your best friend here. I use a simple technique to prevent the slime from just breaking apart and floating around. Properly vacuuming the aquarium gravel lets you remove debris effectively and keeps the substrate clean. Move slowly to minimize disturbance and clouding.
- Pinch the siphon tube to control the flow, creating a gentle suction.
- Hold the vacuum head just above the cyanobacteria mat.
- Slowly drag the vacuum across the surface, letting it suck up the entire sheet without disturbing the substrate underneath.
- For cyanobacteria on plants or decor, gently wave the siphon head near it to pull it off.
This method effectively removes the bulk of the problem without making a bigger mess in your tank.
Quick Water Change and Cleaning Routine
Manual removal should always be followed by a significant water change. This isn’t a normal maintenance day; this is an emergency clean-up operation.
Step-by-Step Cleaning Process
- After siphoning out the cyanobacteria, perform a 50% water change. This removes spores and excess nutrients released during cleaning.
- Clean your filter sponges or pads in the old tank water you just removed. Never use tap water, as it will kill the beneficial bacteria.
- Wipe down the inside glass with a dedicated aquarium algae scraper to remove any leftover film.
- Prune any plant leaves that are heavily coated and unlikely to recover.
- Refill your tank with temperature-matched, dechlorinated water.
This aggressive cleaning and water change combo gives you a fresh, clean slate to work from for the next phase of treatment.
Effective Treatments for Cyanobacteria: Natural and Chemical Options
Natural Remedies and Their Application
If manual removal doesn’t fully solve the issue, you can turn to natural treatments that alter the tank’s environment to be less hospitable to the bacteria. To prevent biofilm from coming back, maintain stable water parameters and perform regular maintenance of the substrate and equipment. Small, frequent water changes also help keep nutrients low and discourage re-growth.
Carbon Dosing and Biofilm Disruption
This is a slightly more advanced technique, but I’ve found it incredibly effective. Cyanobacteria often thrive when there’s an imbalance between nitrogen (nitrates) and other nutrients.
- You can dose a liquid carbon supplement, like those used for planted tanks, directly onto visible cyanobacteria patches with a pipette during a filter-off period.
- The carbon disrupts the bacteria’s cellular processes, causing it to die back.
- Simultaneously, introducing beneficial bacteria via a commercial product can help outcompete the cyanobacteria for resources.
This one-two punch of direct disruption and biological competition tackles the problem from two different angles.
Chemical Treatments: Safety and Precautions
Sometimes, an infestation is so stubborn that a chemical treatment is the most practical solution. Use these as a last resort and follow the instructions to the letter.
- Erythromycin is an antibiotic that specifically targets cyanobacteria. It is generally safe for fish but can impact your biological filter.
- Always remove any chemical filtration, like carbon, before treatment.
- Be prepared to monitor your water parameters closely for an ammonia spike after treatment and have a water change plan ready.
Chemical treatments are a powerful tool, but they require careful handling to avoid crashing your tank’s ecosystem.
Is Copper Safe for Planted Tanks?
I strongly advise against using copper-based algaecides in a planted tank, especially if you keep invertebrates like shrimp or snails. Copper is highly toxic to invertebrates and can also damage or kill many sensitive aquatic plant species. It can linger in your substrate and hardscape, causing problems long after the initial treatment. That’s why many hobbyists prefer natural over chemical algae treatments. They’re safer for invertebrates and plants and help support long-term tank balance.
Long-Term Strategies to Prevent Cyanobacteria Growth
Nutrient Control Through Routine Maintenance
Cyanobacteria is a symptom of an imbalance, not the root cause. The real victory comes from creating a stable environment where it can’t get a foothold again.
Monitoring Water Parameters Regularly
You need to become a detective with your water test kit. Focus on these key parameters:
- Nitrates (NO3): Keep them below 20 ppm through regular water changes. Cyanobacteria can thrive even when nitrates are seemingly low if phosphates are high.
- Phosphates (PO4): Aim for a level below 1.0 ppm. High phosphates often come from overfeeding, decaying plant matter, or your source water.
- Dissolved Organics: These are harder to test for, but consistent vacuuming and filter cleaning keep them in check.
Consistent testing is your early-warning system, letting you correct imbalances long before a slime outbreak occurs.
Adjusting Lighting and Flow for Balance
Cyanobacteria love stagnant water and long periods of light. Making adjustments here can make a world of difference. Knowing how to distinguish cyanobacteria from true algae helps you apply the right removal strategies. Identification matters because cyanobacteria often require different cleanup steps and water management.
Reducing Photoperiod and Increasing Aeration
Take a hard look at your lighting schedule. I recommend a “siesta” period or a straight reduction.
- Reduce your total photoperiod to 6-8 hours daily. You can even try a 4-hours-on, 4-hours-off, 4-hours-on schedule to disrupt the cyanobacteria’s growth cycle.
- Ensure no direct sunlight hits the tank at any point during the day.
- Increase water flow and surface agitation. Use a wavemaker or an air stone to eliminate dead spots where cyanobacteria mats typically form.
Better flow and less light create an environment that favors your plants and fish, not the slimy blue-green intruder. Different aquarium plants require different amounts of light. Some thrive in bright light, while others do well with modest lighting.
Water Parameters and Maintenance for Cyanobacteria Control
Ideal Levels to Discourage Growth
Cyanobacteria is an opportunist that explodes when nutrient levels get out of whack. The most critical numbers to watch are your nitrates and phosphates, aiming to keep nitrates below 10 ppm and phosphates under 0.5 ppm. I’ve found that when my tank’s nitrate creeps past 20 ppm, I often see the first slimy blue-green patches appear within days.
Testing for Nitrates, Phosphates, and More
You can’t fix what you don’t measure. A good liquid test kit is your best friend here.
- Test for nitrates weekly. If they’re high, you’re overfeeding or under-cleaning.
- Phosphate tests are equally vital, as this is a primary fuel for cyano.
- Don’t ignore your pH. Cyano often thrives in higher, more alkaline water, so keeping it neutral (around 7.0) can help.
- Check your water source! Your tap water might be secretly supplying phosphates.
Testing your tap water is a game-changing step many aquarists overlook, revealing if you’re accidentally adding the problem with every water change.
The Impact of Water Changes and Filtration Upgrades
Think of water changes as directly diluting the cyanobacteria’s food supply. A series of large water changes is one of the most effective physical ways to combat a bloom, as it manually removes the bacteria and its nutrients. I’ll do 50% changes every other day during a bad outbreak, and the improvement is visible immediately. In fish tanks, bacterial blooms can cloud the water and stress inhabitants. Regular water changes help clear bacterial blooms in tanks and restore clarity.
How Frequent Changes Reduce Nutrient Buildup
Consistency is more powerful than quantity. Here’s the logic:
- Frequent, smaller water changes prevent nutrients from ever peaking.
- They steadily export waste before it can break down into nitrate and phosphate.
- This creates a stable environment where beneficial plants and bacteria outcompete the cyano.
Upgrading your filter or just cleaning it can make a huge difference, as a clogged filter recirculates waste instead of removing it. Consider adding chemical filtration like phosphate-removing media to your filter basket for an extra line of defense.
After the Outbreak: Restoring Your Aquarium’s Health
Reseeding Beneficial Bacteria Post-Treatment
Many cyanobacteria treatments, especially antibiotics, can wipe out your good filter bacteria along with the bad. Your top priority after the water is clear is to reseed your tank’s biological filter to prevent an ammonia spike. I treat my filter like a patient in recovery after a course of medication. That recovery translates into better water quality for your aquarium and healthier fish. Monitor ammonia and nitrite to confirm the tank is on the path to healthy fish.
Steps to Rebuild a Balanced Ecosystem
Don’t just wait and hope. Take these active steps to rebuild:
- Add a high-quality bottled beneficial bacteria product directly into your filter for several days.
- If you have a second, healthy aquarium, borrow a piece of filter media or some substrate to instantly transfer bacteria.
- Reduce feeding by half for a week to lower the bioload on the recovering system.
- Test for ammonia and nitrite daily to catch any mini-cycles early.
Adding live plants at this stage is a fantastic long-term strategy, as they will consume the nutrients cyanobacteria would otherwise use. In addition, live plants speed up the cycling process by absorbing ammonia and nitrite as they appear, helping beneficial bacteria establish faster. This makes the early stages of a new tank safer and more stable.
Ongoing Monitoring to Prevent Recurrence
Beating cyanobacteria once is a battle, but keeping it away is the war. The key to long-term success is establishing a simple, non-negotiable maintenance schedule that you can stick with. The hum of the filter should be a sound of stability, not a reminder of chores you’ve put off.
Setting Up a Maintenance Schedule
Here is the basic weekly and monthly schedule I follow to keep my tanks crystal-clear.
- Weekly: Test nitrate levels. Scrape the inside glass. Prune any dead plant leaves. Vacuum 25% of the substrate during a water change.
- Bi-Weekly: Rinse filter media in old tank water (never tap water!) to prevent clogging.
- Monthly: Test phosphate levels. Deep clean the inside of the filter housing and check impellers for debris.
This routine takes me less than 30 minutes a week but saves me countless hours fighting algae and sick fish.
FAQs
Is copper safe for treating cyanobacteria in planted tanks?
No, copper is generally not safe for use in planted tanks. It is highly toxic to invertebrates like shrimp and snails and can harm or kill sensitive aquatic plants. Copper can also persist in the substrate and hardscape, causing ongoing issues long after treatment.
How long does cyanobacteria treatment typically take to clear?
The time frame varies but often ranges from a few days to two weeks, depending on the severity and treatment method. Manual removal and water changes can provide immediate visual improvement, while natural or chemical treatments may take several days to fully eliminate the bacteria. Consistent follow-up is essential to ensure it doesn’t return quickly.
Are there natural remedies effective against cyanobacteria?
Yes, natural methods like carbon dosing and adding beneficial bacteria can be effective. Liquid carbon supplements applied directly to cyanobacteria patches disrupt their growth, while beneficial bacteria products help outcompete them for nutrients. These approaches are safer for fish and plants but require careful application for best results.
Can reducing nutrients help control cyanobacteria in a tank?
Yes, lowering excess nutrients like nitrates and phosphates is a key strategy for control. Cyanobacteria flourish when these nutrients are imbalanced, so regular water changes and mindful feeding can starve them out. This proactive approach helps maintain a stable environment where plants outcompete the bacteria for resources.
Your Path to a Cleaner, Healthier Tank
To beat cyanobacteria, focus on manual removal and improving water circulation and nutrient balance. Consistent water testing and adjustments to your lighting schedule are powerful tools for long-term control.
Being a dedicated fish keeper means embracing the routine care that keeps your aquatic pets safe and happy. Stay curious and keep exploring new ways to maintain your aquarium’s delicate ecosystem for years of enjoyment. It’s useful to know which maintenance tasks are essential and how often to perform them. That frequency keeps water quality stable and your fish thriving.
Further Reading & Sources
- How to Control Blue-Green algae – AquaPlant: Management of Pond Plants & Algae
- Addressing Blue-Green Algal Blooms
- Preventing Algal Blooms with a “Pinch of Sugar” | US EPA
- How to fight blue-green algae in your aquarium? Try this guide
- How to Eliminate Blue-Green Algae in Pool: Ultimate Prevention & Treatment Guide – South West Pools
Lia is an expert in aquarium and pet fish care. Having worked in the marine industry and having cared for multiple pet fish, she has acquired first hand expertise on aquarium care, maintenance and setup. She always brings her practical expertise and science to help solve any aquarium related queries.
Algae Control