Crystal Clear Aquariums: Your Step-by-Step Guide to Removing Hard Water Stains for Good
Published on: December 18, 2025 | Last Updated: December 18, 2025
Written By: Lia Annick
Hello fellow fish keepers! That chalky white film clouding your aquarium glass is more than just an eyesore-it can block your view of Captain Fin’s vibrant colors and make tank maintenance feel like a chore.
This guide will help you eliminate those stains safely and prevent them from returning, so you can get back to enjoying the shimmer of your fish in pristine water.
Inside, you’ll find:
- ✓
- ✓
- ✓
- ✓
- ✓
- ✓

- Why hard water stains form and how to identify them correctly
- Safe, fish-friendly cleaning supplies you might already have at home
- A detailed, step-by-step process to scrub away stains without harming your aquarium’s balance
- Proven methods to keep hard water stains from ever fogging up your glass again
I’ve spent years maintaining high-tech planted tanks and breeding sensitive fish, so I know what works without risking your aquatic friends’ health.
What Are Hard Water Stains and Why Do They Form?
Hard water stains are the crusty, white, or chalky marks you see on your aquarium glass. They are deposits of calcium and magnesium carbonate, often called limescale, left behind when water evaporates. Think of it like the mineral ring left in a tea kettle, but on your prized tank. These stains, or hard water stains in aquariums, are caused by minerals in hard water and evaporation. They can be prevented by using conditioned or RO/DI water and by regular cleaning to remove mineral buildup.
- Hard water stains are calcium deposits or limescale from mineral buildup. As water evaporates from your aquarium, it leaves the dissolved minerals behind. These minerals then bake onto the glass or acrylic surface, creating a stubborn film.
- The main cause is simple evaporation. Every time a little water turns to vapor, the minerals it contained don’t disappear-they stay right on the glass. Areas just above the waterline, where splashing and condensation occur, are the most common trouble spots. The harder your tap water (meaning the more dissolved minerals it has), the faster these stains will appear.
- No, these stains do not directly harm your fish or plants. The minerals that form the stains are often the same ones present in the water column that your fish and plants live in. You can rest easy knowing that hard water stains are primarily a cosmetic issue that affects your view, not your aquatic pets’ health.
Your Step-by-Step Guide to Cleaning Hard Water Stains
Getting rid of that cloudy film is a satisfying task. If your tank is new, you may be experiencing new tank syndrome—cloudy water as beneficial bacteria adjust. With the right approach, you can restore your tank’s crystal-clear view without any stress to your aquarium’s inhabitants.
-
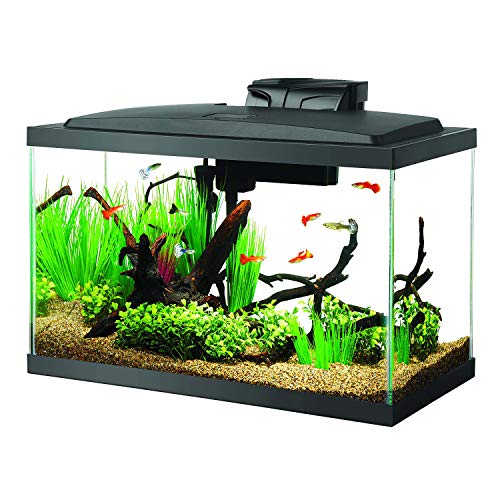
Step 1: Prepare your tank by removing fish, decor, and equipment safely.
You’ll need to work on an empty tank. Carefully net your fish and place them in a temporary holding bucket filled with your tank’s original water. Remove all decorations, plants, and equipment like heaters and filters. This gives you full, unobstructed access to the glass. If you’re setting up a brackish tank, start by planning the salinity and brackish-safe substrate and décor. The next steps will show how to mix the salt and acclimate species. -
Step 2: Choose a cleaning solution like vinegar or citric acid for descaling.
White distilled vinegar is my go-to; it’s cheap, effective, and safe when rinsed properly. A 1:1 mix of vinegar and water in a spray bottle works perfectly. For tougher stains, use full-strength vinegar. Citric acid powder dissolved in water is another excellent, fish-safe option for descaling. -
Step 3: Apply and scrub with tools like soft brushes or algae scrapers.
Spray your chosen solution generously onto the stained glass and let it sit for a few minutes to dissolve the minerals. I’ve found that a soft-bristled brush or a brand-new, plastic-bladed algae scraper provides the perfect scrubbing power without risking scratches. For acrylic tanks, use only soft cloths or acrylic-safe pads. Hard water stains behave differently on glass versus acrylic. Use the right tools for each surface to avoid damage and restore clarity.
-
Step 4: Rinse thoroughly with dechlorinated water to ensure no residue.
This step is non-negotiable. Any leftover cleaning solution can be deadly to fish. Wipe down the glass with a clean cloth soaked in dechlorinated water. I always do a final rinse, pouring dechlorinated water over the entire interior surface and wiping it dry to be absolutely certain. This is part of deep cleaning your aquarium, step by step. Following these steps helps ensure the tank is clean and safe before you move on. -
Step 5: Reassemble the tank and check for clarity.
Once the tank is completely clean and dry, put everything back. Reinstall your decor, refill the tank with conditioned, temperature-matched water, and gently acclimate your fish back to their home. Take a moment to admire your handiwork-that sparkling, streak-free view is your reward.
Best Tools and Methods for Stain Removal
Having the right gear makes this entire process smoother and protects your tank from accidental damage. The single most important rule is to never use household scrubbers, razors, or abrasive pads on an aquarium without knowing your tank’s material first.
Safe Cleaning Tools for Your Aquarium
- Microfiber Cloths: These are my absolute favorite for light film and final polishing. They are lint-free and gentle on all surfaces.
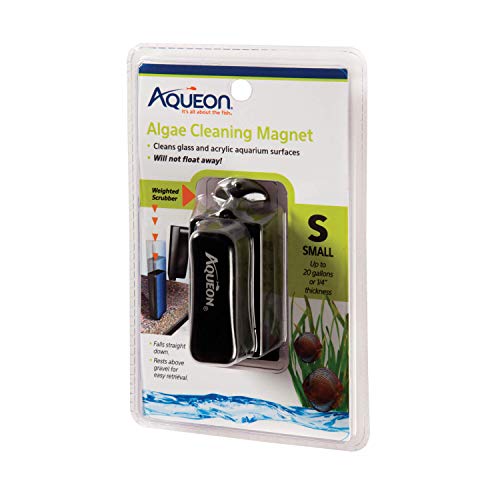
- Magnetic Algae Cleaners: A fantastic hands-off tool for regular maintenance. Ensure the felt or pad on the inside is clean before each use to avoid trapping grit that can scratch.
- New Sponges: Designate a brand-new, soft-cellulose sponge specifically for aquarium use. Avoid any with built-in scouring pads.
- Plastic Scraper or Old Gift Card: For stubborn mineral deposits on glass, a dedicated plastic aquarium scraper or a repurposed plastic card works wonders without the risk of metal fragments.
Glass vs. Acrylic: A Critical Distinction
Using the wrong tool on your tank can leave permanent, cloudy scratches. The approach is completely different for each material, so it’s essential to know how to prevent scratches when cleaning your fish tank.
For Glass Aquariums
- Glass is much more scratch-resistant. You can safely use a single-edged razor blade held at a 45-degree angle to scrape off crusty limescale.
- I keep a dedicated razor holder in my fishkeeping kit just for this purpose. The satisfying *scritch* as the scale comes off is pure bliss.
- Magnetic cleaners with a felt pad are perfectly safe for daily use on glass.
For Acrylic Aquariums
- Acrylic is soft and scratches if you even look at it sideways. Under no circumstances should you use a razor blade or any metal tool on an acrylic tank.
- Your only options are plastic scrapers, microfiber cloths, and your fingernail for softer deposits.
- Use a separate, brand-new magnetic cleaner designated only for acrylic, as any trapped sand in an old one will ruin the surface.
DIY Solutions vs. Commercial Products
You don’t always need a fancy chemical to get the job done. A simple pantry staple is often all you need.
- The Vinegar Solution: Plain white distilled vinegar is a powerhouse for dissolving calcium and magnesium deposits. I use a 1:1 mix with water in a spray bottle for heavy stains. For light water spots, straight vinegar works faster.
- Lemon Juice: Citric acid is another effective, natural option. It works well but can be slightly less potent than vinegar on really thick, white crust.
- When to Go Commercial: For years of neglected, rock-hard deposits that vinegar can’t touch, a commercial lime and scale remover is your next step. You must choose a product labeled as aquarium-safe, fume-free, and rinse the area thoroughly multiple times after application. The last thing you want is chemical residue near your fish.
Tackling Tough Stains: Extra Tips and Tricks
When Soaking Needs a Boost
For those crusty, white deposits that refuse to budge, extending your soaking time can make all the difference. I’ve left decor in a vinegar bath for several hours, even overnight, for severe cases. Patience is your best tool here; longer contact allows the acid to fully break down the mineral bonds. Always use a plastic container for soaking and ensure the item is fully submerged.
- Increase soaking duration to 2-4 hours for moderate buildup.
- For extreme cases, a 12-hour soak is safe with white vinegar.
- Agitate the water occasionally to help lift the stains.
Gentle Home Remedies That Work
You might already have powerful, fish-safe cleaners in your kitchen. Citric acid powder, mixed with water, is fantastic for dissolving scale without harsh fumes. I keep a bag of citric acid on hand-it’s my go-to for glass lids and heater tubes where stains accumulate. Diluted lemon juice also works, but rinse thoroughly to avoid any sugary residue.
- Create a citric acid solution: one teaspoon per cup of warm water.
- For lemon juice, mix equal parts juice and water in a spray bottle.
- Apply, let sit for 10-15 minutes, then scrub gently with a soft cloth.
Why Harsh Chemicals Are a No-Go
It’s tempting to reach for strong cleaners, but they can seep into silicone seals or leave toxic traces. I learned this early on when a friend’s tank crash was traced back to chemical residue. Your aquarium is a closed ecosystem; even tiny amounts of bleach or ammonia can devastate your fish and beneficial bacteria. Stick to vinegar, citric acid, or dedicated aquarium-safe products. Vinegar, properly diluted and thoroughly rinsed, is a safe option for cleaning a fish tank. Rinse well and recheck water parameters before returning fish.
- Avoid anything with perfumes, dyes, or antibacterial agents.
- Never use razor blades on acrylic tanks-they will scratch.
- If you must use a stronger product, remove and rinse the item outside the tank multiple times.
How to Prevent Hard Water Stains from Coming Back
Cleaning those stubborn stains is a victory, but the real win is stopping them from ever forming again. Prevention is all about managing the minerals in your water before they have a chance to settle and bake onto your glass. A little proactive care saves you from a major scrubbing session later.
Stick to a Rigorous Maintenance Routine
Your best defense is a consistent offense. Hard water stains are essentially evaporated mineral deposits, so you need to stay ahead of the evaporation cycle.
- Perform weekly partial water changes of 15-25%.
- Every time you do a water change, use a clean, algae pad to wipe the waterline glass, both inside and out.
- This quick 30-second wipe removes the fresh, soft mineral film before it hardens into a crust.
I make this wipe-down a non-negotiable part of my weekly water change ritual, and it has completely eliminated the need for heavy-duty cleanings.
Use the Right Water and Manage Evaporation
What you put into your tank directly determines what sticks to it. Tap water is often the primary source of calcium and magnesium.
- If your tap water is very hard, consider using a mix of tap water and reverse osmosis (RO) or distilled water to soften it.
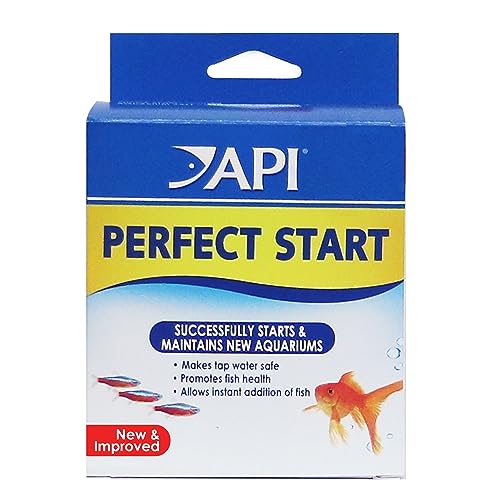
- Always treat any new water with a dechlorinator before adding it to your aquarium.
- Keep a tight-fitting lid on your tank to drastically reduce evaporation, which is the main driver of mineral concentration at the waterline.
A solid lid is one of the most effective, yet often overlooked, tools for preventing hard water stains. It keeps the water in and the minerals dissolved where they belong.
Establish a Consistent Cleaning Schedule
Don’t wait for the white crust to become a visible problem. Incorporate these small tasks into your regular fish-keeping schedule to prevent major buildup.
- Daily: Visually check the waterline for a faint, greasy-looking film.
- Weekly: Wipe the interior and exterior glass at the waterline during your water change.
- Monthly: Deep clean your tank lid and light fixture, as these also collect mineral dust from evaporation.
By making these small habits part of your routine, you protect the crystal-clear view of your underwater world without the back-breaking labor.
Keeping Your Fish Safe During Cleaning

- Move your fish and plants to a temporary home before you start cleaning. I use a clean 5-gallon bucket filled with 75% water from their tank and 25% fresh, dechlorinated water to keep parameters stable. For sensitive species like Captain Fin, I add a small sponge filter to maintain water quality. Place the bucket in a quiet, shaded spot to reduce stress.
- Always rinse the aquarium and decorations with dechlorinated water, never straight from the tap. Chlorine can damage fish gills and kill beneficial bacteria. I prepare a separate bucket with water treated with conditioner-the same one I use for water changes-and rinse until surfaces feel smooth and water runs clear.
- Avoid any household cleaners, and test your water after reassembling the tank. Soaps or chemicals leave toxic residues. I rely on aquarium-safe scrapers and white vinegar diluted with water (rinsed thoroughly!). Before returning fish, I check ammonia, nitrite, and pH levels to ensure a safe environment.
FAQs
How can I test the hardness of my tap water?
You can easily test your tap water’s hardness using a GH (General Hardness) test kit, available at most pet stores or online. These kits provide a simple color-change reading to indicate mineral levels. Knowing your water’s hardness helps you tailor prevention strategies, like adjusting water sources or treatments.
Do I always need to remove my fish when cleaning hard water stains?
For quick, light cleaning at the waterline with just a damp cloth, you may not need to move your fish if done gently. However, for any scrubbing or use of cleaning solutions, it’s safest to relocate your fish to a temporary holding container. This prevents stress and avoids any risk of exposure to residues. Even when cleaning the tank itself, keep the water still and movements slow to minimize stress for the fish. This calm approach helps keep the fish comfortable while you work.
Can hard water stains alter the water chemistry in my tank?
Hard water stains are mineral deposits on surfaces and do not directly change water chemistry. However, the hard water source itself can contribute to elevated pH and hardness levels over time. Regular testing and partial water changes help maintain stable conditions for your aquatic life. Regular water changes are essential because they dilute waste products and toxins that can accumulate between tests. Doing them often helps keep pH and hardness within safe ranges for your aquatic life.
How do hard water deposits impact my aquarium equipment over time?
Mineral buildup can reduce the efficiency and lifespan of equipment like filters, heaters, and pumps by clogging intake tubes or coating heating elements. Clean equipment periodically with a vinegar solution to dissolve deposits. This proactive maintenance ensures reliable performance and avoids unexpected failures.
Keep Your Glass Gleaming
A clean, clear view of your fish starts with using the right tools and a gentle touch. A simple white vinegar solution and a bit of elbow grease will safely dissolve those stubborn white stains without harming your aquatic pals. To extend this care to the tank itself, disinfect tools and décor outside the water and rinse thoroughly before reassembly. For tank sanitation, use aquarium-safe cleaners and rinse away all residues to protect your fish.
Remember, a pristine tank is just one part of creating a thriving home for your fish. Stay curious, keep learning about their needs, and you will be rewarded with a beautiful, healthy underwater world for years to come.
Further Reading & Sources
- Hard Water Stains | Cleaning and Maintenance Forum
- Removing Hard Water Stains from an Aquarium – YouTube
- impossible hard water stains | Aquarium Forum
- How To Remove Hard Water Stains From Fish Tanks – Cuteness
- r/Aquariums on Reddit: Impossible to remove hard water stains on fish tank
Lia is an expert in aquarium and pet fish care. Having worked in the marine industry and having cared for multiple pet fish, she has acquired first hand expertise on aquarium care, maintenance and setup. She always brings her practical expertise and science to help solve any aquarium related queries.
Regular Cleaning