
Chlorine vs Chloramine: Unmasking Tap Water’s Threat to Your Aquarium
Hello fellow fish keepers! That moment of doubt before adding tap water to your tank is a sign you care deeply about your aquatic pals. I get it-I’ve felt that same chill wondering if my water is truly safe for finned friends like Captain Fin and Goldie.
This guide cuts through the confusion, giving you the clarity and control you need. We will break down the chemistry of chlorine and chloramine, highlight their distinct dangers to fish and bacteria, and compare every removal method from conditioners to filters.
My advice comes from hands-on experience, having nurtured delicate ecosystems in high-tech planted tanks and bred fish for years, ensuring creatures from shy Shadow to feisty bettas thrive.
Chloramine and Chloramine Decoded: Why Your Tap Water Isn’t Fish-Ready
That clean, almost pool-like smell from your faucet? That’s your first clue your water isn’t safe for your aquarium yet. Municipal treatment plants add disinfectants to make water safe for us to drink, but these same chemicals are outright toxic to fish, shrimp, and the vital bacteria in your filter. You must neutralize these chemicals every single time you add tap water to your tank, no exceptions. Unlike distilled water, which is free from chemicals but also lacks essential minerals.
What is Chlorine in Municipal Water?
Chlorine is the traditional disinfectant. It’s a fast-acting gas that kills harmful pathogens in the water supply quickly. Think of it like a swift, powerful punch to bacteria and viruses. For us, it’s great. For your tank, it’s a broad-spectrum poison. The good news is that chlorine is relatively unstable and will naturally gas off into the air if you let water sit for 24-48 hours. This is where the old “age your water” advice comes from.
What is Chloramine and Why Do Cities Use It?
Chloramine is chlorine’s more persistent cousin. It’s created by bonding chlorine with ammonia. This bond makes it much more stable and longer-lasting in the water pipes, which is exactly why many cities have switched to it. Chloramine won’t gas off with simple aging; it can linger in water for days or even weeks, making traditional water aging methods completely ineffective for removal. You need a chemical neutralizer to break the chlorine-ammonia bond.
The Aquarium Impact: How These Chemicals Stress Fish and Tank Balance
The shimmer of your betta’s scales and the busy foraging of your corydoras depend on pristine water. Introducing chlorine or chloramine disrupts everything in a cascade of harm.
Immediate Effects on Fish Health
These chemicals directly attack fish gills, the delicate organs they use to breathe. Damaged gills can’t absorb oxygen properly. You might see your fish gasping at the surface or breathing rapidly. Fish like Captain Fin, with his flowing fins, are especially vulnerable as their increased surface area absorbs toxins faster. Other immediate signs include frantic swimming, flashing (rubbing against objects), and lethargy. It’s a brutal assault on their most basic bodily function.
Long-Term Consequences for Your Tank’s Ecosystem
The damage goes far beyond your fish. Your entire tank’s stability relies on beneficial nitrifying bacteria, the unseen heroes living in your filter and substrate. Chlorine and chloramine are indiscriminate killers.
- They wipe out your biological filter: A dose of untreated tap water can crash your cycle, leading to deadly ammonia and nitrite spikes.
- Chloramine adds a double whammy: When you neutralize it, the chlorine portion is detoxified, but the ammonia portion is released directly into your tank. This is why some water conditioners also detoxify ammonia.
- Plant life suffers: Delicate plants and important microorganisms in the substrate are also harmed, undermining the whole ecosystem you’ve worked to build.
Shadow, your corydoras, feels this deeply as the bacterial bed in the sandy substrate he sifts through becomes a toxic zone instead of a healthy buffet. The long-term consequence is a perpetually unstable tank, constant fish stress, and an uphill battle for clarity and balance.
Testing Your Water: The First Step to Knowing What You’re Dealing With
You can’t fight what you don’t know is there. Before you even think about conditioners, grab a test kit to see if your tap water contains chlorine, chloramine, or both. This simple act saves you from guessing and ensures your fish aren’t exposed to hidden toxins during water changes. I learned this the hard way years ago when my tap water source switched to chloramine without warning, and a basic chlorine test gave me a false sense of security.
Simple Test Kit Methods for Home Use
For home use, you have two main choices: test strips and liquid reagent kits. Test strips are fast and convenient-just dip and compare the color. Liquid test kits, like those from API, are far more accurate for detecting chloramine’s stubborn presence and are worth the extra minute for peace of mind. To use a liquid kit, fill the test tube with tap water, add the drops, cap it, shake gently, and watch for a color change that matches the guide.
Always test fresh tap water that hasn’t sat out, as chlorine can gas off and skew results. If your test shows any hint of yellow or green for total chlorine, you’ve likely got chloramine in the mix and need a conditioner that specifically breaks it down.
Chemical Removal: Choosing and Using a Water Conditioner
Once you know your enemy, a good water conditioner is your best ally. Think of it as a shield for your fish’s gills. Always choose a product that loudly states it neutralizes both chlorine and chloramine on the label, as not all dechlorinators are created equal. I keep two types on hand: a basic one for emergencies and a premium blend for my regular water treatment.
Dechlorinator Dosing: A Step-by-Step Guide
Getting the dose right is non-negotiable for fish health. Here’s my fail-safe method every time I prep new water.
- Step 1: Determine the volume of tap water you are treating. I use a clean, dedicated 5-gallon bucket for this so I always know the amount.
- Step 2: Check your product label for the correct dose per gallon. For chloramine, you often need a double dose, so read carefully.
- Step 3: Add the conditioner to the water before pouring it into the tank. This gives it time to work and prevents any raw tap water from touching your fish.
- Step 4: Stir gently and wait a minute for it to work. You should see a slight shimmer as it binds the toxins, making the water instantly safe.
Never pour conditioner directly into a tank full of fish and then add untreated tap water on top of it-this can create toxic pockets that stress your livestock. Always treat the new water in a separate container first.
Understanding Conditioner Ingredients: Sodium Thiosulfate vs. Premium Blends
The core ingredient in most basic dechlorinators is sodium thiosulfate. It’s excellent at breaking the chlorine molecule apart. However, sodium thiosulfate alone struggles with chloramine because it leaves behind ammonia, which you then must handle with your biological filter. This is where premium blends shine.
Premium conditioners, like Seachem Prime, contain additional reducing agents and ammonia detoxifiers. These advanced formulas not only split chloramine into chlorine and ammonia but also instantly neutralize the ammonia into a safe, non-toxic form for over 24 hours. For a stocked tank, especially with sensitive species, investing in a premium blend is a smart move for overall water safety.
Filtration Methods: Installing a Physical Barrier for Cleaner Water
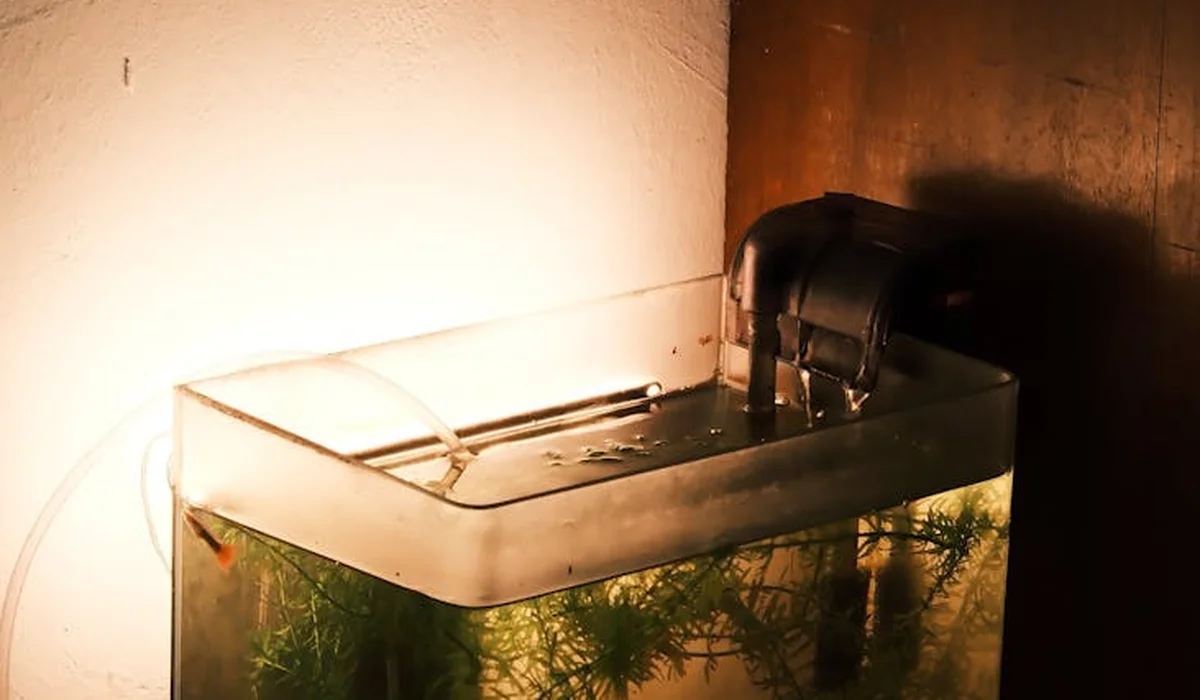
Hearing the steady hum of my filter used to stress me out when I relied solely on liquid conditioners. Adding a physical filtration stage gives you proactive control, turning your tap into a safe, consistent source for every water change.
Activated Carbon and Carbon Filters: The Classic Choice
Granular activated carbon (GAC) is the workhorse many of us start with, nestled in a filter bag or cartridge. It adsorbs chlorine through a vast network of pores. I kept Captain Fin’s first tank clear with a simple carbon insert, and his iridescent colors really popped under the light.
For chloramine, standard carbon has a critical flaw. It can break the chlorine-ammonia bond but often leaves ammonia behind. You’ll see this as a spike on your test kit. Consider basic carbon a good chlorine fighter, but a poor chloramine contender for the long haul.
To use it effectively:
- Always place carbon after mechanical filtration so debris doesn’t clog its pores.
- Change it every 3-4 weeks, as it exhausts quickly.
- Use it in tandem with an ammonia-neutralizing water conditioner for chloramine-heavy water.
Advanced Media: KDF and Catalytic Carbon for Stubborn Chloramine
When my city switched to chloramine, I noticed Shadow, my corydoras, was less active after water changes. This pushed me to upgrade. KDF media, often a brass-colored granular mix, uses redox reactions to convert chloramine into harmless salts.
Catalytic carbon is a specialized, high-performance carbon with a enhanced surface structure. It doesn’t just trap chloramine; it helps catalyze its breakdown. Combining KDF and catalytic carbon in a multi-stage filter is my recommended shield for reliable chloramine removal.
From my setup:
- KDF-55 is common for chlorine and heavy metals, while KDF-85 targets chloramine more directly.
- Catalytic carbon typically lasts twice as long as regular carbon against chloramine.
- These media work best with slower water contact time, so don’t overpower the filter with a massive pump.
Reverse Osmosis Systems: The Purest Solution
A reverse osmosis (RO) unit is the gold standard, producing nearly pure H₂O by forcing water through a fine membrane. It strips out chlorine, chloramine, nitrates, phosphates, and even heavy metals, giving you complete control over your water chemistry. In aquariums, RO water offers a clean starting point for precise parameter control. This is covered in the complete guide to using RO water in aquariums.
I run an RO system for my sensitive planted tanks and for Goldie’s goldfish water, which I then remineralize. The crystal clarity of RO water is unmatched, but remember, it’s too pure for fish to live in directly. You must add back essential minerals.
My remineralization steps:
- Collect the RO water in a clean, dedicated barrel.
- Add a commercial remineralization salt to achieve a GH around 6-8 and a KH of 3-5 for stability.
- Always aerate and temperature-match this water before it touches the tank.
Comparing Your Options: From Pitcher Filters to Whole-Tank Setups

The right choice balances your tank volume, your budget, and the effort you want to expend. The decision should also include choosing the right aquarium size for your fish species, since space needs vary. Different species require different amounts of space to swim and grow. Seeing your fish thrive in pristine water is the reward, whether you use a simple pitcher or a complex system.
Filtration Method Comparison for the Home Aquarist
This table breaks down the practical realities of each approach based on my years of trial and error. Your local water report is the essential first step to inform this decision.
| Method | Best For Tank Size | Removes Chlorine? | Removes Chloramine? | Relative Cost & Maintenance | My Personal Take |
|---|---|---|---|---|---|
| Carafe/Pitcher Filter | Nano tanks (<5 gallons) | Yes, moderately | Rarely effective | Very low cost; frequent cartridge changes | I used one for a small shrimp jar. It’s slow and impractical for anything beyond top-offs. |
| Faucet-Attached Filter | Small to medium tanks (5-30 gallons) | Yes, effectively | Only models with catalytic carbon | Moderate cost; cartridges every 2-3 months | A solid step-up. I’ve used them for water changes on my 20-gallon community tank with good results. |
| Under-Sink Multi-Stage Filter | Medium to large tanks (30-75+ gallons) | Yes, excellently | Yes, with KDF/Catalytic stages | Higher upfront cost; annual media changes | My current workhorse. It delivers chloramine-free water on tap for all my tanks, from Shadow’s domain to Goldie’s palace. |
| Reverse Osmosis System | All sizes, especially for sensitive species or breeding | Yes, completely | Yes, completely | High initial investment; membrane and filter changes 1-2 times yearly | It requires extra steps but offers ultimate purity. I wouldn’t breed certain fish or grow fussy plants without it. |
| Whole-House System | Multiple large tanks or fish rooms | Yes, completely | Yes, completely | Very high cost; professional installation often needed | This is for the dedicated aquarist. It protects every faucet, making water changes anywhere in the home a breeze. |
Living with Municipal Water: Pro Tips for Seasonal Changes and Reports
Your tap water is not a static resource; it’s a living, changing product of your local treatment plant. Treating your aquarium successfully means becoming a student of your own municipal water supply, learning its seasonal rhythms and knowing how to interpret its official health data. To apply this at home, follow a step-by-step guide to test your aquarium water properly. Regular testing helps you tailor changes to your tank’s needs.
How to Read a Water Quality Report for Fish Keeping
Every year, your water provider publishes a Consumer Confidence Report (CCR). Most people glance at it and toss it, but for us, it’s a treasure map. Your goal isn’t to understand every part per billion, but to pinpoint a few critical entries.
First, scan for the disinfectant used. You’ll typically see it listed as “Total Chlorine Residual” or a specific note on chloramine. Finding the phrase “chloramine (or combined chlorine)” confirms you need a dechlorinator labeled for it, not just a basic chlorine remover.
Next, look for pH and hardness (often as Calcium Carbonate). A sudden shift in your report’s annual pH average from 7.0 to 7.8 signals your tank’s balance might be challenged soon. This is why pH in an aquarium matters: it affects the form and toxicity of chemicals like ammonia and helps determine which species can thrive. A stable pH supports overall water quality and the health of sensitive inhabitants. Finally, check for heavy metals like copper or lead. Even trace amounts safe for humans can be devastating for invertebrates like shrimp or sensitive scaleless fish like my Corydoras, Shadow.
- Key Report Sections: Disinfectant Type (Chlorine/Chloramine), pH, Total Alkalinity, Total Hardness, Copper, Lead.
- Actionable Insight: A high hardness level means your water has great buffering capacity (stable pH), but may not be ideal for breeding soft-water species.
- Pro Move: Compare this year’s report to last year’s. A trend is more telling than a single snapshot.
Adjusting Your Routine When Tastes or Smells Change
Your senses are your first, and sometimes best, water testing kit. That earthy, musty odor or a sudden change from a clean chlorine scent to a swimming-pool punch means the treatment plant has altered its chemical cocktail.
An earthy smell often indicates a seasonal algae bloom at the source, leading to increased chloramine use to bind with organic matter. The moment you detect a new scent from your tap, double-dose your water conditioner for the next few water changes as a precaution-it’s cheap insurance for fish like Captain Fin, who can show gill irritation within hours.
In spring, faster snowmelt or heavy rains can flush different minerals and organics into the reservoir. During these times, I make a habit of testing my tap water after conditioning, not just my tank water. It reveals what you’re actually adding.
- Pause and Sniff: Always smell your tap water before filling your change bucket.
- Test the Source: Use a liquid test kit on your freshly drawn, conditioned tap water for pH and ammonia (chloramine breaks down into ammonia).
- Condition First: Always add your dechlorinator to the new water before it goes into the tank, ensuring instant neutralization.
- Observe Your Fish: Watch for rapid gill movement or flashing (scratching) after a water change, which are immediate distress signals.
## Common Questions
What is the best type of water filter system to remove both chlorine and chloramine for my aquarium?
For reliably removing both chlorine and stubborn chloramine, an under-sink multi-stage filtration system is highly effective. Look for systems that specifically combine catalytic carbon and KDF media, as this duo works through both adsorption and redox reactions to neutralize both threats. For the purest water, especially for sensitive species or breeding tanks, a Reverse Osmosis (RO) system is the gold standard, removing virtually all contaminants.
How much should I expect to spend on a home filtration system for my fish tank water?
Costs vary significantly based on the system’s capacity and technology. Simple faucet-attached filters start around $30-$70, while under-sink multi-stage units range from $100 to $300. A standard Reverse Osmosis (RO) system for aquarium use typically costs between $150 and $400. Remember to factor in the ongoing cost of replacement filter cartridges or membranes, which are essential for maintained performance. Make sure to choose the right filtration system for your aquarium type to ensure optimal water quality.
Where can I find reliable reviews for chlorine/chloramine water filtration systems?
Specialized aquarium forums and trusted product review sites are invaluable. Look for reviews from long-term hobbyists on forums like Reef2Reef or plantedtank.net, who discuss real-world performance over months. Additionally, detailed video reviews from established aquarium YouTube channels often provide hands-on setup and testing insights that go beyond basic retail website reviews.
Should I buy a pre-made system or build a DIY water filtration system?
For most aquarists, a pre-made system from a reputable brand offers the best balance of reliability, safety, and warranty. DIY systems can be cost-effective for advanced hobbyists with the technical knowledge to properly source safe components and ensure correct water contact time. However, a miscalculation in a DIY setup can lead to chloramine breakthrough, risking your entire tank’s health. Whether you DIY or buy, prioritize a safe build with quality components and proper installation. Weighing the safety, warranties, and maintenance of DIY vs store-bought gear helps ensure a confidently built, healthy aquarium.
Your Water, Their World
The single most reliable practice is to always treat any new tap water with a quality conditioner that neutralizes both chlorine and chloramine before it ever touches your tank. Make it a non-negotiable habit, just like feeding your fish, to protect the delicate balance of their home.
Caring for an aquarium is a commitment to understanding the invisible chemistry that keeps your fish thriving, starting with the water that flows from your tap. Stay curious, keep testing, and your reward will be a vibrant, healthy ecosystem you can enjoy for years to come. Regular testing and timely water changes help improve water quality, supporting healthy, active fish.
Further Reading & Sources
- Chlorine vs. Chloramines: What’s the Difference? | Aquasana
- Chlorine vs Chloramine: What’s The Difference? | Culligan of Los Angeles
- What Is the Difference Between Chlorine and Chloramine?
- Chlorine to Chloramines: Key Facts and Differences
- 5.5. Chlorine and Chloramine in the Aquarium
Lia is an expert in aquarium and pet fish care. Having worked in the marine industry and having cared for multiple pet fish, she has acquired first hand expertise on aquarium care, maintenance and setup. She always brings her practical expertise and science to help solve any aquarium related queries.
Water Quality