The Silent Alarm: Spotting the Signs Your Aquarium Needs Resealing Before It’s Too Late
Hello fellow aquarists. That nagging worry about a potential leak or a slowly failing seal is one of the most stressful parts of our hobby. Spotting the early warnings saves you from a catastrophic flood and keeps your aquatic friends safe and sound.
This guide will walk you through exactly what to look for, covering:
- The visual red flags and subtle clues of sealant failure
- How to perform a simple, safe stress-test on your tank’s seams
- A step-by-step breakdown of the resealing process
- Knowing when a quick fix is enough or when a full reseal is necessary
I’ve maintained high-tech planted systems for years, and learning to read these signs has saved my floors and my fish more than once.
Spotting the Early Warning Signs of Seal Failure
- Water seepage along the seams, where you might feel a constant cool dampness or see tiny beads of moisture. Even a minor seep can silently damage your stand and flooring over time.
- Silicone peeling away from the glass or acrylic, creating gaps that look like tiny lifted edges. Once peeling starts, the seal’s integrity is already compromised.
- Bubbles trapped within the silicone seams, which appear as small, rounded voids when you look closely. Bubbles indicate poor adhesion and are weak points under water pressure.
- Damp spots on the stand or floor around the tank base, often feeling moist to the touch. Persistent dampness is a clear signal that water is escaping where it shouldn’t.
- Mold growth near the aquarium, showing up as fuzzy white or black patches with a musty odor. Mold thrives in hidden, wet areas and can affect both your tank’s health and your home’s air quality.
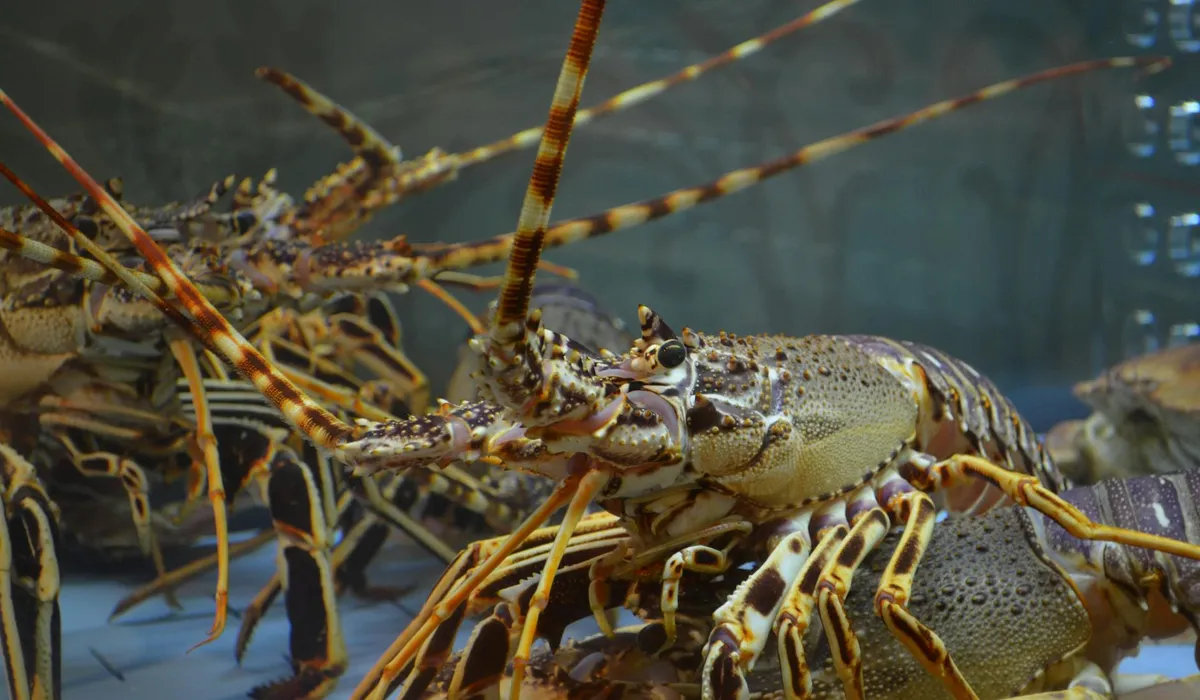
- For glass tanks, silicone issues are more visible and often show as discolored or brittle seams. Glass relies heavily on silicone for structural support, so any flaw is a big deal.
- Acrylic tanks may develop fine, hairline cracks or seam separations that are harder to spot without a bright light. Acrylic’s flexibility can hide stress until it’s too late, so inspect regularly.
Visual Clues on Silicone and Seams
- Discoloration of the silicone, shifting from clear or white to yellow, brown, or green tones. Discolored sealant has usually lost its elasticity and waterproof qualities.
- Gaps between the silicone and glass or acrylic, which you can check by gently running a fingernail along the seam. Any gap, no matter how small, is an invitation for water to escape.
- Soft spots in the silicone that feel spongy or give way under light pressure. Healthy silicone should be firm; soft areas mean it’s breaking down and can’t hold back water.
- Inspect corners and edges with a flashlight, looking for any lifting, cracking, or unevenness. Corners bear the most stress, so they’re often the first place failures appear.
Water-Related Red Flags
- Unexplained water loss where you’re refilling the tank more frequently than normal evaporation rates. If your water level drops noticeably between weekly top-offs, suspect a leak rather than just evaporation.
- Puddles or pooled water directly under or around the aquarium stand. Puddles are a definite red flag that the seal is failing and needs immediate attention.
- High evaporation rates that seem excessive compared to similar setups in your home. Evaporation should be steady; sudden increases often point to a hidden leak.
- Water stains on wooden stands or nearby surfaces, leaving behind rings or darkened areas. Stains are evidence of past leaks that may still be active or worsening.
Assessing the Severity of Aquarium Leaks
- Identify the leak source by drying the area and watching for moisture reappearance. Pinpointing the exact spot helps you decide if it’s a quick fix or a major reseal.
- Evaluate the flow rate-whether it’s a slow seep, occasional drip, or steady stream. The faster the leak, the more urgent your response needs to be.
- Check for structural issues like cracks in the glass or warping in acrylic panels. Structural damage often means the entire tank is at risk of failure.
- Use simple leak detection methods, such as placing a dry paper towel along seams to see where it gets wet. This low-tech approach can confirm leaks without specialized equipment.
Minor Issues You Can Monitor
- Small damp spots that appear occasionally and dry up on their own. As long as they don’t grow or lead to water loss, you can keep an eye on them during routine checks.
- Slight silicone wear with minor discoloration or tiny bubbles but no active leaking. These early signs don’t always mean disaster, but they warrant closer observation.
- Minimal water level changes that align with typical evaporation patterns. If evaporation is consistent and slow, it’s probably not a leak yet.
Major Problems Demanding Quick Action
- Active dripping from seams or corners, where water is visibly escaping. This is a crisis situation; delay can lead to tank failure and harm your fish.
- Stress cracks in the glass or acrylic, often radiating from impact points or seams. Cracks can spread rapidly under water pressure, so act fast to prevent a burst.
- Corrosion on metal frames or stands, showing as rust or pitting from water exposure. Corrosion weakens the support system, raising the risk of a catastrophic collapse.
Routine Maintenance to Prevent Sealant Deterioration
Keeping your aquarium’s silicone seals in top shape starts with consistent, simple habits. Proactive care dramatically extends the life of your tank and prevents unexpected leaks that can harm your fish and damage your home. I make it a point to integrate these checks into my monthly water change routine, which keeps everything manageable. It’s just one of the essential maintenance tasks to perform regularly.
- Inspect all silicone seams visually and by touch for any soft spots, discoloration, or lifting.
- Control room humidity with a dehumidifier or good ventilation to prevent mold and silicone weakening.
- Use smooth, rounded substrate and avoid sharp decorations that can scrape against the glass during cleaning.
- Keep water chemistry stable; sudden pH swings from 6.0 to 8.0 can stress sealant over time.
- Ensure your tank stand is perfectly level to distribute water pressure evenly across all seams.
Regular Inspection Routines
A quick monthly check-up takes only minutes but gives you immense peace of mind. Run your finger gently along every interior seam, feeling for any grittiness, flexibility, or areas that don’t feel perfectly smooth and adhered. In my own tanks, I do this right after feeding-it’s become a ritual. Look closely for tiny bubbles within the silicone or any whitish, chalky residue, which are early warnings.
- Check the top and bottom corners, as these are high-stress points that often fail first.
- Use a bright flashlight shone at an angle across the seams to reveal hidden gaps or thinning silicone.
- Note any changes in a simple log; this helps you track the seal’s condition over months and years.
Environmental Factors Affecting Seal Longevity
Your tank’s surroundings play a huge role in how long the silicone lasts. Temperature fluctuations of more than 5°F in a short period cause the glass to expand and contract, slowly fatiguing the sealant. I learned this the hard way with a tank placed near a drafty window. Water chemistry is another silent culprit; very soft, acidic water can be more aggressive on silicone than harder, alkaline water.
Place your aquarium away from direct sunlight, which can degrade silicone and promote algae that hides problems. Avoid locations with constant vibration from speakers or heavy footfall, as this mechanical stress weakens the bond over time. When repairs are needed, choose aquarium-safe sealants and repair kits to avoid toxic residues. Look for products explicitly labeled for aquarium use and follow curing times to protect fish and beneficial bacteria. For most community tanks, maintaining a stable temperature between 72-78°F and a neutral pH around 7.0 creates the kindest environment for your seals.
Step-by-Step Guide to Resealing Your Fish Tank
If your inspection reveals it’s time for a reseal, don’t panic. Resealing a tank is a very achievable DIY project that can save you the cost of a new aquarium. I’ve resealed several of my own tanks, from a 10-gallon to a 75-gallon, and the process is fundamentally the same. Just set aside a weekend for the job to ensure proper curing. For a do-it-yourself, step-by-step guide to resealing a fish tank aquarium, you can follow along as you read. I’ll outline the essential steps below to help you stay on track.
Gathering Your Resealing Toolkit
Having the right materials on hand makes the job smoother and safer. You must use 100% aquarium-safe silicone sealant, as other types contain fungicides that are toxic to fish. I always keep a spare tube in my fishkeeping supplies. For the best aquarium sealant DIY resealing project, careful prep and choosing the right sealant are essential. With the right tools and a patient approach, you’ll achieve a durable, leak-free seal. Here is what you will need:
- Aquarium-safe silicone (clear is best for a clean look)
- Razor blades or a specialized silicone removal tool
- Rubbing alcohol and lint-free cloths for cleaning
- Painter’s tape to mask off edges for neat lines
- A caulking gun for easy application
- A temporary home for your fish, like a spare tank or large food-safe bins
Executing the Resealing Process
- Safely relocate your fish and drain the tank completely. Use water from the tank to fill their temporary holding container and keep the filter media wet to preserve your beneficial bacteria. This is the most critical step for your fish’s health.
- Remove every bit of the old, compromised silicone. Use a razor blade to carefully cut and peel it away. Scrape until the glass is perfectly clean, then wipe the seams with rubbing alcohol to remove any invisible residue. Any leftover old sealant will prevent a strong new bond.
- Apply the new sealant in one continuous, steady bead. Hold the caulking gun at a 45-degree angle and press firmly. I run my finger dipped in soapy water over the bead to smooth it and ensure it presses deeply into the corner. This creates a professional, watertight seal.
- Let the silicone cure fully before testing for leaks. Follow the product directions, but typically this means 24 hours for a skin to form and 48 hours for a full cure. After curing, fill the tank with water and let it sit for 24 hours, checking the outside for any moisture. Only then is it safe to reassemble and reintroduce your fish.
Deciding Between DIY and Professional Resealing Services
Facing a leaking or aging aquarium seal can feel overwhelming, but your approach depends on a few key factors. I always start by assessing the tank size, my budget, and the severity of the damage before grabbing any tools. Next, you’ll identify and locate the leak in your fish tank to plan the repair. Understanding the leak source helps you decide whether a seal repair or tank replacement is needed.
- Smaller tanks under 20 gallons often suit DIY efforts because they are lighter and easier to maneuver. The cost of materials is low, and mistakes are less catastrophic.
- Budget plays a huge role; DIY resealing might cost you $20-$50 for silicone and supplies, while professionals can charge $100-$300 or more. Weigh this against the value of your time and peace of mind.
- Complex damage like multiple leaking seams or bowed glass demands expert eyes to prevent total failure. Simple, minor wear on a single seam is something you can often handle yourself.
When DIY Resealing Makes Sense
If you enjoy hands-on projects and have a steady hand, DIY resealing can be deeply satisfying. I’ve successfully fixed many small tanks myself, saving money and learning valuable skills each time. Being aware of common mistakes to avoid when resealing a fish tank can help you get a reliable seal. I’ll highlight the key pitfalls to watch for.
- Small aquariums, typically 10 gallons or less, are ideal for DIY since their weight and silicone needs are minimal. You can easily empty, clean, and reseal them on a sturdy table.
- Minor issues like a tiny section of peeling silicone or slight cloudiness in the sealant are perfect for a DIY touch-up. Just ensure the underlying glass is sound.
- Budget-friendly approaches include using 100% aquarium-safe silicone and repurposing old credit cards as smoothing tools. Always work in a well-ventilated area and allow full cure times-usually 24-48 hours.
Situations Calling for Expert Help
Some resealing jobs carry too much risk for a DIY attempt. Calling a professional is smarter when the tank’s structure is compromised or you lack confidence in your abilities.
- Large aquariums over 55 gallons require professional handling due to their immense weight and pressure. One wrong move could lead to a disastrous leak or break.
- Structural cracks in the glass or frames mean the tank’s integrity is failing, and no amount of silicone can truly fix it. Experts can assess if repair is possible or if replacement is safer.
- If you are unsure about safety or the correct silicone type, hiring a pro avoids potential harm to your fish and home. They bring experience that ensures a watertight, long-lasting seal.
FAQs
How much does it cost to reseal a fish tank?
The cost depends on whether you do it yourself or hire a professional. When you compare DIY vs professional resealing, the main question is how the costs stack up. DIY resealing typically costs $20-$50 for aquarium-safe silicone and supplies, while professional services can range from $100 to $300 or more, depending on tank size and location. For larger tanks, professional help is often pricier but ensures safety and reliability.
Are there resealing kits available for fish tanks?
Yes, resealing kits are available online or at aquarium supply stores and usually include aquarium-safe silicone, applicators, and sometimes tools for removal. Consider the tools and materials you’ll need beyond the silicone—like a plastic scraper, masking tape, and clean rags. Make sure all tools are aquarium-safe. These kits can simplify the process for DIY enthusiasts by providing all necessary materials in one package. Always check that the silicone is 100% safe for fish and free of harmful additives.
How can I find a professional to reseal my fish tank near me?
Start by searching online for “aquarium resealing service” or “fish tank repair” in your area, and check reviews on platforms like Yelp or Google. Local fish stores or aquarium clubs often have recommendations for trusted professionals who specialize in this work. Always verify their experience and ask for references to ensure quality service. Or, if you prefer a DIY route, you can follow a do-it-yourself, step-by-step fish tank guide for fixing a leaking or cracked fish tank. This can help you decide whether a home repair is feasible or if you should hire a professional.
What advice does Reddit offer for resealing a fish tank?
Reddit communities like r/Aquariums emphasize using 100% aquarium-safe silicone and thoroughly removing old sealant to prevent leaks. Many users share step-by-step DIY guides and stress the importance of allowing full cure times-typically 48 hours-before refilling. They also recommend testing the resealed tank with water for 24 hours to check for leaks before adding fish back in.
Your Next Steps for a Watertight Tank
Stay alert for cloudy silicone, persistent dampness, or a slow, mysterious drop in water level, as these are your tank’s clear distress signals. When you confirm a leak or see significant seal degradation, a full reseal is the only safe, permanent solution for your aquatic pets.
Being a proactive fish keeper means respecting the hardware that keeps your ecosystem safe and stable. Your commitment to learning and timely maintenance is what transforms a simple glass box into a thriving, long-lasting underwater world.
Further Reading & Sources
- Repairing / Sealing an Aquarium
- r/Aquariums on Reddit: My first Aquarium Re-Seal: Lessons learned, resources that helped me, and seeking any advice/feedback you may have
- How to reseal an aquarium in 7 simple steps!
- How do I properly reseal a 250 gallon aquarium | Reef2Reef
- 14.12. Silicone Sealant for an Aquarium
Lia is an expert in aquarium and pet fish care. Having worked in the marine industry and having cared for multiple pet fish, she has acquired first hand expertise on aquarium care, maintenance and setup. She always brings her practical expertise and science to help solve any aquarium related queries.
DIY Projects