Saltwater Aquarium Myths: 9 Costly Beliefs That Beginners Fall For
Hello fellow reef enthusiasts. That shimmering blue world calls to you, but you’ve heard the whispers-that saltwater tanks are impossibly difficult and wildly expensive. I’m here to tell you that many of those daunting stories are built on common, costly myths.
This guide will help you sidestep expensive mistakes by busting these widespread falsehoods:
We will cover the myths surrounding tank size and cost, the truth about water changes and testing, the realities of live rock and lighting, and the facts about fish compatibility and disease.
I’ve learned these lessons through years of maintaining thriving reef tanks and breeding delicate marine species.
Debunking Fish Compatibility and Health Myths
One of the fastest ways to turn your beautiful tank into a battlefield is by misunderstanding which fish can live together. Researching fish behavior before you buy is the single most effective way to prevent aggression and loss. It’s not just about size; it’s about temperament, territory, and diet. Choosing the right tank mates is crucial to reduce fish stress and aggression.
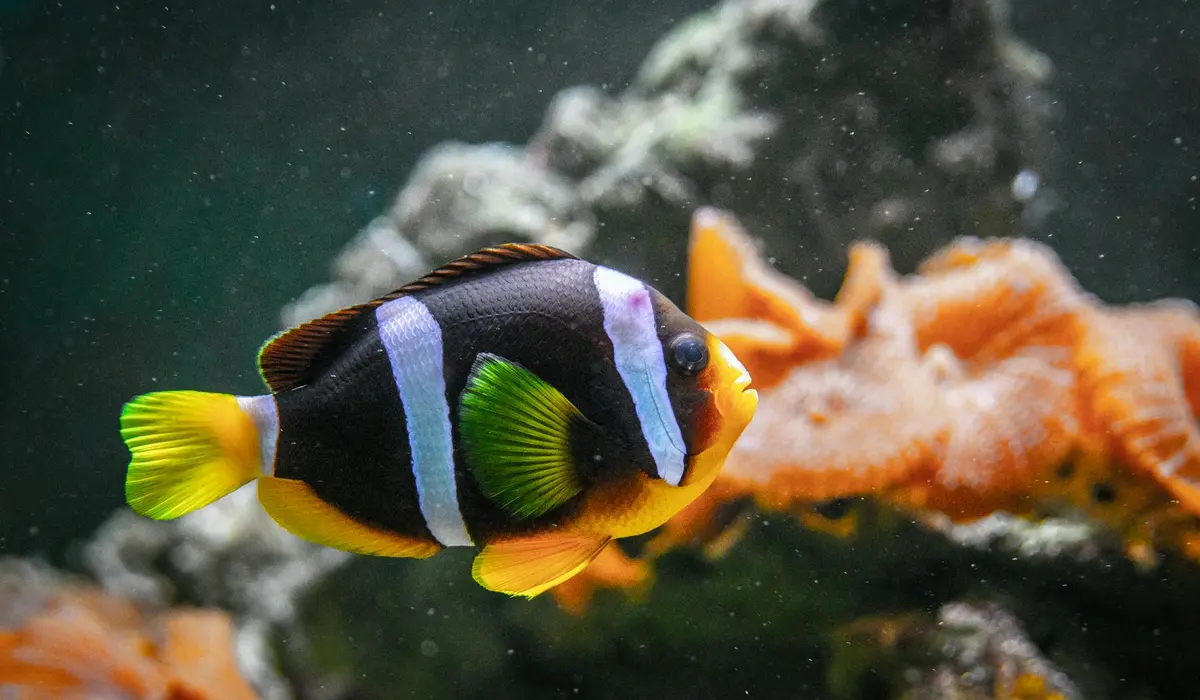
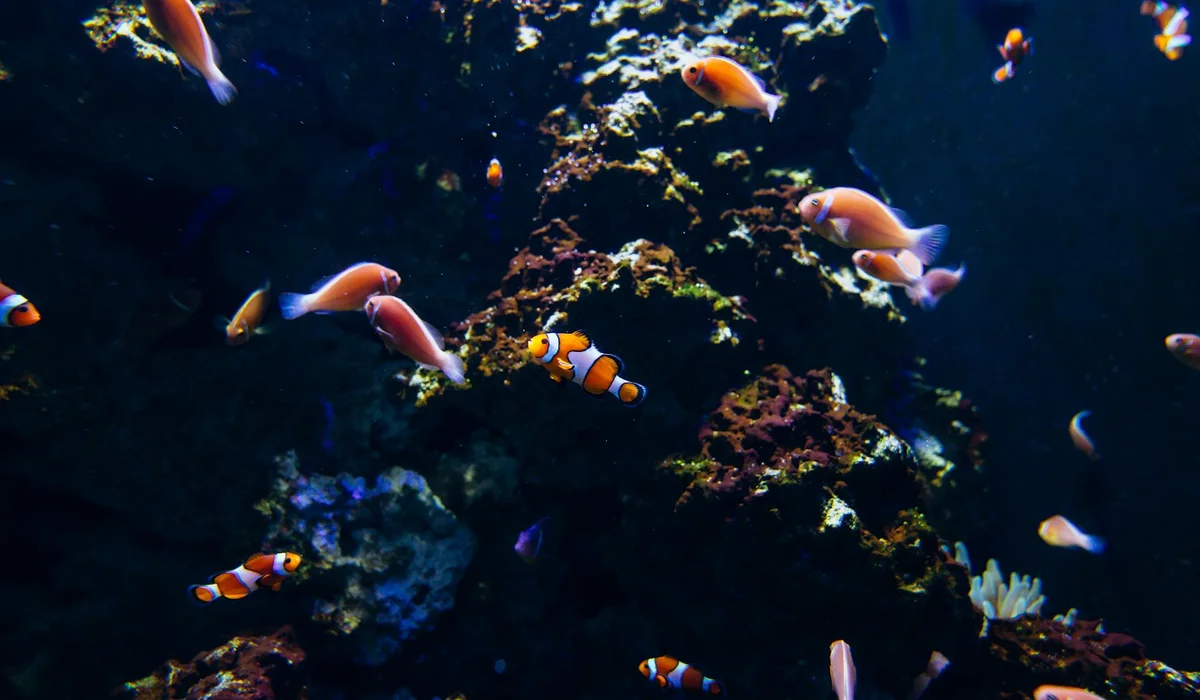
Myth 1: All Saltwater Fish Are Reef-Safe
The term “reef-safe” is more of a hopeful guideline than a hard rule. “Reef-safe” truly means a fish is highly unlikely to bother corals, clams, or ornamental invertebrates. A fish-only tank gives you much more flexibility, while a reef tank requires careful, specific choices.
Many stunning fish see your corals as a snack bar. Large Angelfish, like Emperors or Korans, will happily munch on LPS and soft corals. Pufferfish have powerful beaks designed for crushing snails and crabs. Even some smaller Wrasses may pick at your prized shrimp.
To create a peaceful community, focus on known gentle species like Clownfish, Firefish, and certain Gobies. My best advice is to build your community around the most passive fish first, adding more assertive species last to minimize territorial disputes. When choosing compatible fish for your community tank, consider temperament, size, and space. This helps ensure a peaceful, balanced setup. Always have a backup plan, like a second tank, for a fish that turns out to be a bully.
Myth 9: Quarantine Is Optional for New Fish
Skipping quarantine is like playing Russian roulette with your entire aquarium. Skipping quarantine is the most common way parasites like marine ich or velvet get introduced, and these can wipe out every fish you own. A simple observation tank can save you thousands in losses and heartache. To prevent this, properly quarantine new fish in a separate tank for 2–4 weeks to monitor for illness. This extra step dramatically lowers the risk of disease sweeping through your display tank.
Setting up a proper quarantine tank is straightforward. You need a simple 10 to 20-gallon tank, a heater, a humble sponge filter, and a hiding place like a PVC pipe. The sponge filter should be running in your main tank’s sump beforehand to be biologically active. Also, use equipment dedicated to the quarantine tank equipment—net, siphon, and air tubing—to minimize disease transfer. Keep that gear separate from your display setup and disinfect between uses. I run my quarantine for a minimum of 4 weeks, carefully observing for any signs of illness before a new fish ever sees the display tank.
During this time, watch closely for these signs of illness: flashing or rubbing against objects, rapid gill movement, white spots like salt grains, or a loss of appetite. Catching a disease in an empty quarantine tank is a manageable problem; catching it in your full display is a full-blown crisis.
Unraveling Filtration and Water Quality Beliefs
The clarity of your water is a direct reflection of your filtration’s health. Effective saltwater filtration is a three-part system: mechanical removes debris, chemical pulls out dissolved wastes, and biological is the heart of it all, converting toxic ammonia into safer nitrates. Ignoring any one part can lead to instability.
You have options beyond just live rock. Ceramic media, porous dry rock, and specialized bio-balls all provide massive surface area for beneficial bacteria. Water purity is non-negotiable for sensitive corals and fish; impurities like silicates and phosphates are direct fuel for ugly, persistent algae blooms. Regular testing for ammonia, nitrite, nitrate, and phosphate is your early warning system.
Myth 2: Live Rock Is Essential for Biological Filtration
This belief is rooted in tradition, not necessity. Beneficial bacteria will colonize any porous surface, not just live rock; they don’t care if it’s ceramic, plastic, or rock. The bacteria just need a dark, oxygen-rich place to live and multiply.
Live rock is fantastic, but it’s also expensive and can introduce unwanted pests. Dry rock is a much more affordable and pest-free alternative. High-quality ceramic media, like Seachem Matrix, offers an enormous surface area in a small space. To cycle a tank without live rock, you simply add an ammonia source and let your chosen bio-media mature for 4-8 weeks, testing until you see zero ammonia and nitrite.
Myth 4: Protein Skimmers Are a Must-Have
Protein skimmers are fantastic tools, but they are not a legal requirement for every tank. A protein skimmer’s main job is to remove dissolved organic wastes before they break down into nitrate and phosphate. They excel in heavily stocked fish-only or mixed reef tanks.
You can successfully run a low-biocide tank without one. A lightly stocked nano reef or a dedicated seahorse tank might not produce enough waste to justify a skimmer. For nutrient control without a skimmer, I rely on more frequent water changes, a well-stocked refugium with macroalgae, and high-quality filter media like GFO or carbon.
Myth 3: Tap Water Is Acceptable with Dechlorinator
Using tap water is one of the most persistent and damaging mistakes a beginner can make. A dechlorinator makes water safe for fish to breathe, but it does nothing to remove heavy metals like copper, phosphates, nitrates, and silicates that are often present in tap water. These elements accumulate over time, stressing fish and smothering corals.
I learned this the hard way. My first saltwater tank was plagued by a constant film of brown diatom algae. The moment I switched to pure RO/DI water, the algae vanished within two weeks. Compare tap water, which is a chemical cocktail, to RO/DI water, which is a pure, blank canvas for you to build your perfect saltwater environment.
Setting up an affordable RO/DI system is easier than you think. You can get a reliable 4-stage unit that connects to a sink faucet. The basic steps are: connect to a water source, run the waste and product water lines to a drain and collection bucket, and let it fill-you now have unlimited pure water.
Myth 6: RO/DI Water Is Unnecessary for Healthy Tanks
This myth keeps local fish store employees busy selling algae scrapers. Pure RO/DI water is the foundation of a stable tank because it prevents the nutrient pollution that causes algae blooms and dangerous parameter swings. Starting with zero TDS (Total Dissolved Solids) water means you are in complete control of what goes into your aquarium.
I’ve seen tanks running on tap water that look okay for a few months, but the keeper is constantly fighting an uphill battle against murky water and algae. My own experience proved that switching to RO/DI was the turning point from a struggling tank to a thriving, low-maintenance ecosystem.
To monitor your water purity, you need two simple tools. A handheld TDS meter tells you the purity of your RO/DI water—you want a reading of 0. A simple API Master Test Kit allows you to track the core parameters in the tank itself. Regular checks of essential water-quality parameters—pH, ammonia, nitrite, nitrate, and temperature—help you maintain a stable environment for your fish. These readings complement the TDS measurement and give you a fuller picture of your aquarium’s health. Using a TDS meter to confirm your water is pure is the cheapest insurance policy you can buy for your aquarium’s long-term health.
Shedding Light on Lighting and Equipment Misconceptions
Lighting is the sun for your underwater world, and getting it wrong can dim the whole experience. Different corals have wildly different light appetites, much like how a cactus and a fern need different amounts of sun on your windowsill. Soft corals and many LPS (Large Polyp Stony) corals often prefer gentler, more moderate light, while SPS (Small Polyp Stony) corals are the sun-worshippers, craving intense brightness to thrive.
Beyond lighting, temperature is a silent partner in fish health. A reliable heater is non-negotiable for a tropical saltwater tank, as it prevents the dangerous temperature swings that stress fish and weaken their immune systems. That gentle hum from a quality heater provides a stable, warm environment that mimics their natural reef home.
Choosing your lights can feel overwhelming, but your tank’s goals make the decision simple.
- LEDs: My go-to for most hobbyists. They are energy-efficient, generate little heat, and offer full spectrum control and programmable sunrises/sunsets. Perfect for mixed reefs and aquascape-focused tanks.
- T5 Fluorescent: Provides fantastic, even light spread with a proven track record. Great for beginners and those wanting lush coral growth without the intensity of metal halides, though bulbs need replacing annually.
- Metal Halide: The powerhouse. I use these for dedicated SPS-dominated tanks that need intense, penetrating light. They produce a lot of heat and use more electricity, making them a more advanced choice.
Myth 5: Corals Require Powerful Lighting in Every Case
This belief can literally bleach the color and life right out of your corals. Not all corals are created equal when it comes to their light needs.
Many beautiful corals flourish under moderate lighting.
- Mushroom Corals (Discosoma, Ricordea)
- Leather Corals (Toadstool, Finger Leather)
- Zoanthids and Palythoa
- Green Star Polyps
- Many LPS corals like Blastomussa and Acans
Too much light is a form of stress that forces corals to expel their symbiotic algae, a process known as bleaching, which leaves them white and vulnerable. You might also see them retract their polyps or refuse to open fully, a clear sign they’re unhappy with their spot in the tank.
Always acclimate new corals to your lighting to prevent shock.
- Start by placing the new coral low in the tank or in a shaded area.
- Over 1-2 weeks, gradually move it higher towards its final position.
- Many modern LED lights have an acclimation mode that automatically ramps up the intensity for you.
- Observe the coral’s color and extension daily; if it looks pale or shriveled, move it back down.
Exploring Tank Size and Setup Fallacies
The idea that a smaller tank is a simpler start is one of the costliest traps in the hobby. Smaller water volume is far less forgiving, meaning toxins can build up and temperature can swing dramatically from a single mistake. A larger tank acts like a giant buffer, diluting problems and giving you more time to react.
Your choice of substrate also plays a huge role in your tank’s foundation. Live sand is seeded with beneficial bacteria, giving your biological filtration an instant boost and helping to process fish waste from day one. Inert sand is sterile and cheaper, but it will take weeks longer to establish the same beneficial bacterial bed.
For a beginner, I always recommend starting with the largest tank your space and budget can comfortably handle.
- A 40-gallon breeder tank is a fantastic starting point. It offers great stability and plenty of options for fish.
- A 75-gallon tank is even better for long-term success, providing incredible water volume for error.
- If you’re set on a smaller system, consider a 20-30 gallon “all-in-one” tank, but be prepared for more diligent testing and water changes.
Myth 7: Small Tanks Are Too Difficult for Beginners
This one has a kernel of truth but is often overstated. The challenge isn’t the tank’s size, but the speed at which things can go wrong within it.
Nano tanks have a tiny volume of water, so a single drop of contaminant or a small overfeeding has a much more concentrated, immediate impact on water quality. Evaporation alone can alter salinity significantly in just hours, a problem a 100-gallon tank barely notices.
Let’s compare the maintenance reality.
- Small Tank (10-20 gallons): Requires testing every 2-3 days. You’ll need 20-30% water changes weekly. Top off evaporated water daily with fresh RO/DI water.
- Large Tank (75+ gallons): Testing can often be done weekly. Water changes of 10-15% are typically sufficient. An auto-top-off system is highly recommended to handle evaporation automatically.
You can have a stunning and stable small tank with the right planning.
- Successful Species: A pair of Ocellaris Clownfish, a Tailspot Blenny, a cleaner shrimp, and soft corals like Zoanthids.
- Stability Tips: Use an auto-top-off system. Invest in a high-quality protein skimmer. Stick to a light bioload (fewer, smaller fish). Perform small, frequent water changes instead of large, infrequent ones.
Correcting Water Parameter Misunderstandings
Many new reef keepers chase perfect numbers, but this pursuit often causes more harm than good. Stability in your water parameters is far more critical for coral and fish health than hitting an exact number on a test kit. The constant chase for perfection can stress your tank’s delicate inhabitants.
In a reef tank, calcium and alkalinity work together like building blocks for coral skeletons. When one level swings wildly, it directly impacts the other. Magnesium acts as the supporting actor, helping to keep these two elements in balance. Test for magnesium weekly, as low levels can cause your calcium and alkalinity supplements to become ineffective, no matter how much you add.
How Natural Fluctuations Occur and When to Intervene
Your tank is a living system, not a static picture. Small, gradual changes are completely normal. Corals consume alkalinity and calcium throughout the day, causing natural dips. You only need to intervene when a parameter falls outside a stable range for more than 24 hours or shows a rapid, significant drop. A slow drift is manageable; a sudden plunge is a problem.
Safe Methods for Testing and Adjusting
Consistency is your greatest tool. I test my main parameters on the same day every week.
- Use reliable test kits from trusted brands for accurate readings.
- Always make adjustments slowly over several hours or even days.
- For raising alkalinity or calcium, use dedicated supplements and dose them into a high-flow area, like the sump or in front of a powerhead.
- Never mix chemical supplements together in concentrated form before adding them to the tank; this can cause them to bind up and become useless or even harmful.
The golden rule of dosing is to never correct a parameter by more than 10% of its total value in a single day. Patience prevents shock.
Myth 8: Salinity Must Remain Fixed at All Times
This belief can make you a slave to your hydrometer. While stable salinity is vital, a perfectly locked number is a myth. Evaporation removes pure water from your tank, causing salinity to creep up steadily until you replace that lost water. This is a natural and expected process.
An acceptable salinity range for a reef tank is between 1.024 and 1.026 specific gravity. Fish-only tanks can be slightly lower, from 1.020 to 1.025. As long as the change is gradual, your fish and corals can easily adapt to minor shifts within this range. A sudden change of just 0.002, however, can cause severe stress.
Steps for Topping Off Water Correctly
Topping off for evaporation is a daily task, but it’s simple.
- Keep a dedicated jug of RODI (reverse osmosis deionized) water near your tank. Never use tap water.
- Each day, mark the water level on the outside of your aquarium with a dry-erase marker.
- Slowly add the RODI water back to the sump or a high-flow area of the display tank to match your mark.
Adding freshwater slowly over 15-20 minutes prevents any rapid salinity drop that could shock sensitive gills and coral tissues.
Tools for Accurate Salinity Measurement
Throw away the floating plastic hydrometer; its readings are often inaccurate. For true peace of mind, you need a refractometer. A refractometer uses a small water sample and a calibrated scale to give you a precise salinity reading every time. Remember to calibrate it monthly with a special calibration fluid, not just RODI water, for guaranteed accuracy. This one tool is a non-negotiable investment for a healthy saltwater aquarium. It’s been proven to be far more reliable than hydrometers.
Common Questions
Do you need live sand in every saltwater tank?
No, live sand is not a strict requirement for a successful saltwater aquarium. While it can help speed up the cycling process by introducing beneficial bacteria, dry sand will eventually become “live” as bacteria colonize it. The choice between live and dry sand often comes down to your budget and whether you want an immediate biological boost.
Can you keep a reef tank without precise calcium and alkalinity management?
While some soft coral tanks with a light bioload may get by with regular water changes alone, most thriving reef tanks require active management. Corals consume calcium and alkalinity to build their skeletons, and without replenishment, levels can drop, stunting growth and causing instability. For tanks with stony corals, testing and dosing these elements is essential for long-term health.
Is a heater always required in tropical saltwater aquariums?
Yes, a reliable heater is almost always necessary for a tropical marine aquarium. Most aquarium fish and corals come from stable, warm reef environments and require consistent temperatures. Even if your home is warm, daily and seasonal temperature fluctuations can stress livestock, making a heater a critical component for stability. It’s especially important to maintain a stable temperature in marine environments.
Can you start a saltwater aquarium with a small tank and still be successful?
Yes, it is possible to be successful with a small “nano” tank, but it requires more diligence. Smaller water volumes are less stable, meaning parameters can change rapidly from minor issues like overfeeding or evaporation. Success in a small tank hinges on rigorous maintenance, light stocking, and often, specialized equipment like an auto-top off system.
Your Path to a Thriving Saltwater Tank
The most important lesson is that a successful saltwater aquarium is built on patience and proven methods, not quick fixes or old rumors. Invest in proper equipment, master your water testing routine, and always research before you buy any new inhabitant for your tank. For beginners, start with a simple, proven setup. Take your time to learn the basics before you add livestock.
Being a great fish keeper means committing to a journey of continuous learning and responsible pet ownership. Embrace the process, ask questions in community forums, and take pride in creating a beautiful, stable ecosystem for your aquatic pets to flourish.
Further Reading & Sources
- Tank Health: Debunking Common Saltwater Aquarium Myths – The Dixon Pilot
- Freshwater vs Saltwater | Tropical Fish Hobbyist Magazine
- Is Keeping A Saltwater Aquarium Difficult?
- Aquarium Myths and Misinformation | Reef2Reef
- Top 10 Reef Tank Myths – Avoid These Falsehoods, Fabrications, and Fallacies In Your Aquarium – Bulk Reef Supply
Lia is an expert in aquarium and pet fish care. Having worked in the marine industry and having cared for multiple pet fish, she has acquired first hand expertise on aquarium care, maintenance and setup. She always brings her practical expertise and science to help solve any aquarium related queries.
Water Quality