What is the Safest Way to Transport Fish During a Move?
Hello fellow fish keepers. I know that just thinking about moving your aquarium can spike your heart rate faster than a startled school of tetras. You’re not just moving furniture; you’re relocating a living, breathing ecosystem, and the pressure is real.
This guide will walk you through the entire process, breaking it down into manageable steps. We will cover:
- Choosing the right containers for different types of fish.
- Preparing your fish with a pre-move fasting period.
- Handling the tank water and filter media to preserve your cycle.
- Executing a safe travel day plan for any distance.
- Performing a stress-free re-acclimation in the new location.
I’ve moved multiple high-tech planted tanks across states, keeping everything from sensitive shrimp to feisty cichlids safe and sound.
Planning Your Fish Transport Strategy
Timing and Pre-Move Conditioning
Your moving day timeline is the single most important factor for your fish’s survival. I always start the entire process 48 hours before the movers arrive or the truck is packed. This two-day buffer gives you time to manage mistakes and keeps your fish from sitting in containers for too long. That planning also helps you avoid common mistakes when moving a fish tank. For example, rushing setup or neglecting water quality and lid security during transport.
Here is the exact schedule I follow for a stress-free move:
- 48 Hours Before: Stop feeding your fish. This allows their digestive systems to clear out, which drastically reduces the ammonia buildup in their transport water.
- 24 Hours Before: Perform a 50% water change on your main tank and prepare your transport containers by filling them with this clean, familiar tank water.
- Move Day Morning: This is “fish-out” time. Gently catch your fish and place them in their prepared containers right before you need to dismantle the tank itself.
Assessing Your Aquarium’s Needs
Not all tanks are the same, and your transport plan must reflect what lives in yours. A community tank with tetras requires a different approach than a single, large cichlid.
Ask yourself these questions to build your custom plan:
- Fish Size & Temperament: Small, peaceful fish like neon tetras can often travel together in a larger insulated cooler. Larger or aggressive fish, like my betta Captain Fin, need their own individual containers to prevent stress and injury.
- Special Requirements: Do you have sensitive bottom dwellers like Shadow, my corydoras? They need very clean water, so I plan for extra water changes if the trip exceeds 8 hours. Delicate species like discus need stable, warm water, demanding a pre-heated transport box.
- Travel Duration: A one-hour trip is straightforward. For journeys over six hours, you must plan for a battery-powered air pump and possibly heat packs to maintain oxygen and temperature levels.
Taking ten minutes to map out the specific needs of each species in your care is the difference between a smooth transition and a tragic loss.
Gathering Essential Supplies for Safe Transport
Must-Have Items for Fish and Tank
Getting your supplies together ahead of time prevents last-minute panic. You don’t need expensive specialty items; many can be found around your house or at a local department store.
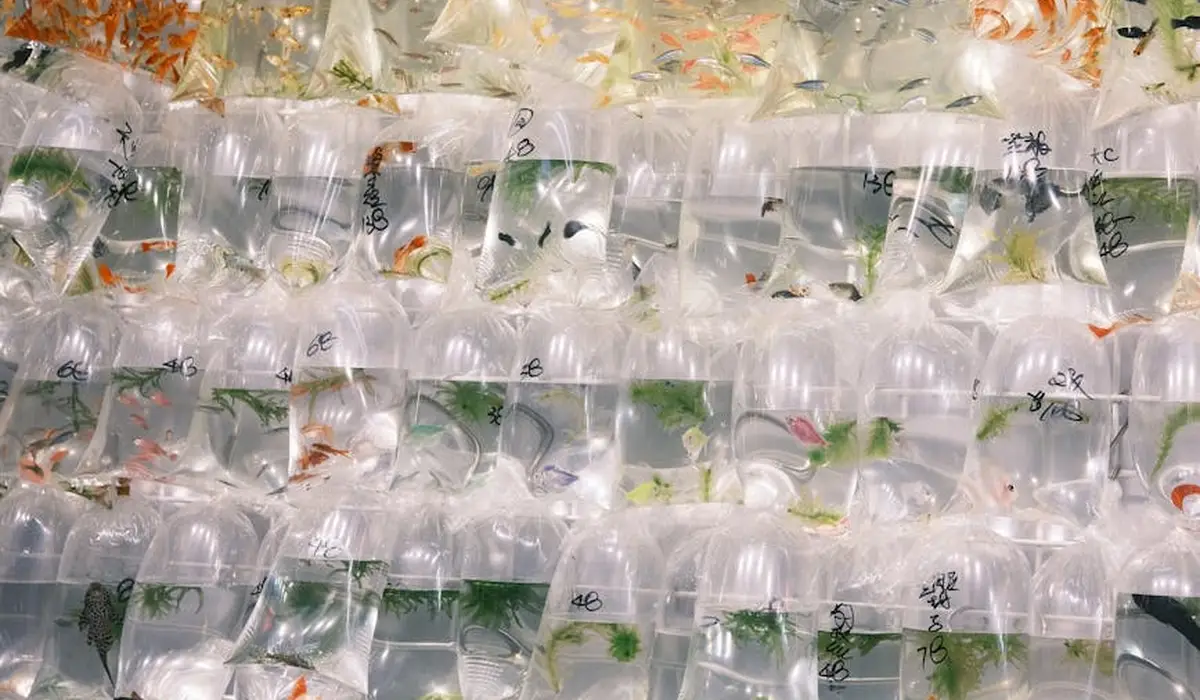
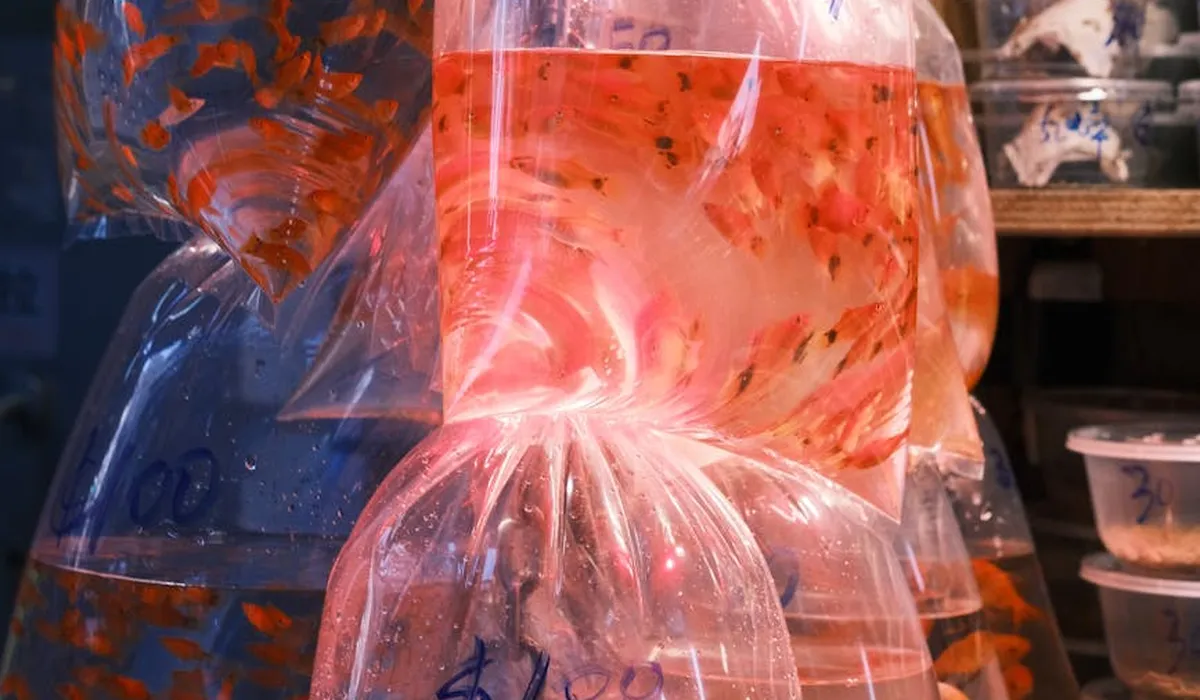
- Fish Transport Containers: Use clean, brand-new 5-gallon buckets with lids or sturdy plastic containers with secure tops. For individual fish, one-gallon mason jars or heavy-duty zip-top bags (double-bagged!) work perfectly.
- Water & Treatment: You must save at least 50% of your aquarium’s water in clean buckets to help re-establish the tank later. Have your water conditioner on hand to treat any new water you need to add.
- Oxygen & Heat: A battery-operated air pump with air stones is non-negotiable for long trips. For tropical fish, include hand warmers or 72-hour heat packs (the kind used for shipping reptiles) to wrap around the containers.
- Insulation: A simple Styrofoam cooler or a cardboard box lined with towels will protect your fish from temperature swings and jarring movements.
I always pack a dedicated “Fish First-Aid Kit” containing a net, extra bags, a thermometer, and your water conditioner right where you can grab it instantly.
Protective Gear for Aquarium Equipment
Your filter, heater, and substrate are the life support system of your aquarium. Packing them incorrectly can ruin them or crash your tank’s cycle when you set it back up.
Follow these steps to protect your gear:
- The Filter: This is your top priority. Do not clean the filter media with tap water. Instead, squeeze it out gently in a bucket of the old tank water you saved, then place the media in a zip-top bag with some of that water. Keeping the filter media wet and alive with its beneficial bacteria is the secret to instantly cycling your tank after the move.
- Substrate & Hardscape: Place gravel, sand, and decor into buckets and keep them moist with tank water. This preserves a huge amount of the beneficial bacteria living on their surfaces.
- The Aquarium Itself: Once completely empty and dry, cushion the glass tank with foam board or moving blankets. Never place anything heavy inside it, and transport it on a flat, stable surface to prevent stress cracks in the silicone seams.
Step-by-Step Guide to Packing Your Fish
Preparing Transport Water and Bags
Your fish will travel in water from their own tank, not new water. This is the single most critical step for preventing shock, as the water is already cycled and the correct temperature and pH for your fish. The day before your move, prepare clean, new fish bags or sturdy, food-grade plastic containers with airtight lids. Do not use containers that have held any chemicals or cleaners. This is part of a complete step-by-step guide on safely moving a fish tank. Following these steps will help you transport the tank and fish with minimal stress.
Fill each bag or container one-third full with water directly from your established aquarium. This leaves two-thirds of the space for vital oxygen, which is far more important for a short trip than having more water. To protect your fish’s slime coat from stress, consider adding a dose of a water conditioner like Seachem Prime directly to the transport water.
Insulating and Securing Fish Containers
Once your fish are safely in their individual travel containers, you must protect them from temperature swings. I always use a high-quality styrofoam cooler because it provides excellent insulation against both heat and cold. Place the sealed bags or containers inside the cooler, packing any empty spaces with crumpled paper towels or bubble wrap to prevent them from sliding around.
For an extra layer of temperature stability, you can include a heat pack designed for shipping live reptiles, but be sure to wrap it in a towel so it doesn’t directly touch the containers. Securing the containers so they remain upright is non-negotiable for a safe and stress-free journey for your aquatic friends. Finally, tape the cooler lid shut to keep the dark, stable environment intact.
Managing the Move with Fish Safety in Mind
Controlling Temperature and Oxygen During Transit
Temperature is your biggest enemy during transport. Your primary goal is to keep the water temperature as stable as possible, avoiding any rapid increases or decreases. Keep the car’s interior climate-controlled, and never leave the fish in a parked car where temperatures can skyrocket in minutes. In cold weather, pre-warm the car before loading the fish.
For trips longer than one hour, oxygen becomes a major concern. If you’re moving sensitive fish or have a long drive, a battery-powered air pump with an air stone is a fantastic investment for keeping the water oxygenated. You can also use portable oxygen tablets, which slowly dissolve and release oxygen into the water, providing a safety net for your fish’s journey.
Handling and Loading Tips
Handle the fish containers with extreme care, as if you were carrying a dozen eggs. Gentle, smooth movements prevent the fish from being tossed around inside their temporary home, which drastically reduces their stress levels. Load the insulated cooler containing your fish last, so it is the first thing you unload at your new home.
Position the cooler securely in the footwell of your car, where it won’t tip over. Clearly label the cooler with “LIVE FISH – FRAGILE – LOAD LAST” to ensure movers or helpers understand its importance. Drive smoothly, avoiding sudden stops and sharp turns to give your fish the calmest ride possible.
Setting Up the Aquarium in Your New Home
Reassembling the Tank and Water Preparation
Once you arrive, your first task is to get that tank back in action quickly. I always start by placing the aquarium on a level, sturdy surface-any wobble can stress the seams over time. Double-check the stand’s stability to prevent leaks or cracks from developing later.
Next, reassemble your filter and heater but don’t plug them in yet. Rinse filter media in a bucket of old tank water you saved during the move to preserve beneficial bacteria. If you didn’t save water, use dechlorinated tap water at roughly the same temperature as your transport containers. Preserving that bacterial colony is your top priority for a stable nitrogen cycle in the new setup.
Now, for water prep. I mix fresh, dechlorinated water with any saved tank water to fill about halfway. Aim for a pH within 0.2 units of the transport water—for most community fish, that’s between 6.5 and 7.5. Temperature should match within 1-2 degrees Fahrenheit. Sudden shifts in water chemistry are a major cause of post-move stress, so test everything with a reliable kit before adding fish (especially pH, ammonia, nitrite, and nitrate levels).
Here’s a simple DIY hack: if you’re short on old water, add a bacterial starter culture to kick-start biological filtration. I’ve done this after moves, and it cuts down cycling time significantly.
- Position the tank securely and level it.
- Reinstall equipment without powering on.
- Use saved or dechlorinated water to rinse media.
- Blend old and new water to maintain parameters.
- Test pH, temperature, and ammonia before proceeding.
Initial Fish Introduction
With the tank ready, it’s time to bring your fish in. Keep them in their transport bags or containers near the tank for 15-20 minutes to equalize temperatures. This simple step reduces thermal shock, which can weaken their immune systems right after a move. After this temperature match, plan for a longer acclimation period. Slowly mix in tank water over the next 30-60 minutes before releasing them into the tank.
I gently open the bags and add small amounts of tank water every 5 minutes for about 30 minutes. For sensitive species like bettas or corydoras, extend this to 45 minutes. Watch for signs of distress – if a fish like Captain Fin (my feisty betta) starts flaring or hiding, slow down the process. Patience here pays off with healthier, more resilient fish in their new home.
Once acclimated, use a soft net to transfer them, avoiding pouring transport water into the tank to prevent contamination. Turn on the filter and heater, and let the hum of the equipment reassure you that things are settling. I always dim the lights for the first few hours to ease their transition and reduce stress-induced behaviors.
- Float transport containers to temperature-match.
- Add tank water gradually over 30-45 minutes.
- Transfer fish with a net, not the transport water.
- Power up equipment and keep lighting low initially.
Acclimating Your Fish to Their New Environment
Gradual Water Adjustment Techniques
Acclimation doesn’t stop after introduction—it continues as the tank stabilizes. I use drip acclimation for the first water change, adding new water slowly over an hour with airline tubing and a valve. Use drip acclimation whenever you’re introducing new fish or when the water source differs from your tank. Start it at the first water change to gradually match temperature and parameters. This method mimics natural environmental changes and helps fish like Goldie, my social goldfish, adapt without shock.
Monitor parameters daily: ammonia should stay at 0 ppm, nitrites at 0 ppm, and nitrates below 20 ppm. If levels spike, perform a 25% water change with pre-adjusted water. For pH adjustments, alter it by no more than 0.2 per day to avoid stressing their osmoregulation. Consistency in water quality is key to preventing diseases like ich or fin rot after a move.
In my experience, adding Indian almond leaves can gently lower pH and release tannins that soothe fish—ideal for species like bettas or tetras. Just steep one leaf per 10 gallons for a natural, calming effect. This approach is part of a complete guide to using Indian almond leaves in your aquarium. For full dosing tips, timing, and tank considerations, check out the full guide.
- Use drip systems for water changes post-move.
- Test ammonia, nitrites, and nitrates every day.
- Adjust pH slowly, not exceeding 0.2 units daily.
- Consider botanical additives for stress reduction.
Post-Move Monitoring and Care
After the move, keep a close eye on your fish for the first week. Look for normal behaviors: active swimming, steady breathing, and interest in food. If Shadow, my shy corydoras, starts hiding more than usual, it might signal lingering stress or water issues.
Feed lightly for the first few days—offer small portions of high-quality food once daily to avoid polluting the water. I fast my fish for 24 hours post-move to let their digestive systems settle, then reintroduce food gradually. Overfeeding now can spike ammonia and undo all your careful preparation. High ammonia in tanks is often caused by overfeeding, leftover food, and inadequate filtration. To learn more about the causes of high ammonia and how to fix it, test the water and perform partial water changes while ensuring your filter is running efficiently.
Check equipment daily to ensure filters are flowing and heaters are maintaining a steady temperature, ideally between 72-82°F for tropical fish. If you notice clamped fins or lethargy, test water immediately and consider a partial water change. Early intervention with water adjustments often prevents minor issues from becoming big problems.
- Observe behavior and appetite daily.
- Feed sparingly and avoid overfeeding.
- Verify equipment function regularly.
- Perform water tests and changes as needed.
FAQs
What is the best type of container for transporting fish?
Use clean, sturdy containers like 5-gallon buckets with lids or insulated coolers to prevent spills and maintain water stability. For individual fish, secure options like double-bagged heavy-duty bags or mason jars work well to reduce stress and injury risks. Always ensure containers are dedicated solely to fish transport and have never held chemicals.
How can I keep the water oxygenated during a long move?
For trips over an hour, a battery-powered air pump with an air stone is essential to maintain oxygen levels and prevent suffocation. Alternatively, portable oxygen tablets can dissolve slowly to provide a backup oxygen source in sealed containers. Regularly monitor fish for signs of distress, like gasping at the surface, to gauge if additional aeration is needed.
Is it safe to transport multiple fish together in one container?
It depends on the fish size and temperament; small, peaceful species like tetras can often travel together in a larger insulated container. However, aggressive or larger fish should be separated into individual containers to avoid fights, injuries, and excess waste buildup. Always consider the travel duration and container size to ensure adequate space and water quality for all fish.
What steps can I take to minimize stress for my fish during transport?
Keep the transport containers in a dark, insulated cooler to reduce visual stimuli and temperature fluctuations, which helps calm the fish. Drive smoothly and avoid sudden movements to prevent the fish from being tossed around in their temporary homes. After arrival, acclimate them gradually to the new tank water to ease the transition and support recovery.
Final Thoughts on Fish Transport
To keep your fish secure during a move, always use clean, sealed containers with original tank water and maintain a stable temperature. If you’re moving a large, heavy tank, plan the lift with helpers and the right equipment to move it safely. Use a dolly or moving straps and pad the tank to prevent damage. Reducing stress by keeping them in a dark, quiet space makes all the difference for their health.
Responsible fish ownership means prioritizing your pets’ comfort and adapting your methods as you learn more. Staying informed about aquarium care ensures your fish thrive, turning challenges into rewarding moments in your hobby.
Further Reading & Sources
- r/Goldfish on Reddit: How do I transport my fish safely
- Safest way to transport fish long distance | Humble.Fish & Reef Community
- Best way to transport fish via car | Reef2Reef
- 5 Ways to Transport Fish – wikiHow
- How to Transport Fish – Fish Vet
Lia is an expert in aquarium and pet fish care. Having worked in the marine industry and having cared for multiple pet fish, she has acquired first hand expertise on aquarium care, maintenance and setup. She always brings her practical expertise and science to help solve any aquarium related queries.
Health & Disease