The Stress-Free Guide to a Perfect Partial Water Change
Published on: December 26, 2025 | Last Updated: December 26, 2025
Written By: Lia Annick
Hello fellow fish keepers. You know that nagging feeling when your tank water looks a little less than crystal clear? You’re right to pay attention-mastering the water change is the single most impactful skill for a thriving aquarium.
This guide will walk you through everything, from the simple tools you need to the tiny details that make a huge difference. We’ll cover:
- The surprising best timing and frequency for your specific tank.
- All the equipment you need, including a budget-friendly DIY hack.
- A calm, step-by-step process that keeps your fish safe and stress-free.
- What to do with your filter (this is where many go wrong!).
- How to treat new water for a seamless transition.
I’ve refined this routine over years of maintaining high-tech planted tanks and breeding sensitive fish.
What Is a Partial Water Change and Why Does Your Aquarium Need It?
A partial water change is the routine removal and replacement of a portion of your aquarium’s water, typically 15-25%. This is fundamentally different from a full water change, which strips the entire tank of its beneficial bacteria and stable chemistry, sending your fish into shock. Think of your tank like a small, enclosed pond. In nature, rainwater refreshes a pond and dilutes waste; a partial water change is your way of simulating that natural process.
The primary role of this task is to manually remove the invisible waste products that your filter can’t eliminate. Over time, fish waste and uneaten food break down into nitrate. While less toxic than ammonia, nitrate slowly builds up and stresses fish, weakening their immune systems. Performing a partial water change is the single most effective way to directly lower nitrate levels before they become harmful.
Beyond waste removal, this process replenishes essential minerals that your fish and plants absorb, like calcium and magnesium. These minerals get used up over time, and tap water is a fresh source. Replacing old water with properly treated new water restores the mineral balance, which is critical for fish health, stable pH, and vibrant plant growth.
Ultimately, this simple act of swapping out a portion of the water is a cornerstone of preventative care. It supports fish health by reducing long-term stress from poor water quality and maintains the delicate biological balance of your entire tank ecosystem. Consistent, small water changes are far better for your aquarium’s stability than infrequent, massive ones.
Gathering Your Partial Water Change Toolkit
Having the right gear on hand makes the process smooth and safe. You don’t need much, but each item is non-negotiable for a proper water change.
- Siphon or Gravel Vacuum: This is your most important tool. It lets you remove water while simultaneously cleaning debris from the substrate. I prefer a simple hose-style gravel vacuum for its effectiveness.
- Clean Buckets: You need at least two: one for removing old tank water and one for holding fresh, treated water. Designate these buckets for aquarium use only to prevent any chemical contamination from soaps or cleaners.
- Dechlorinator: Tap water contains chlorine and chloramines that are toxic to fish. A water conditioner instantly neutralizes these chemicals, making tap water safe. Never skip this step.
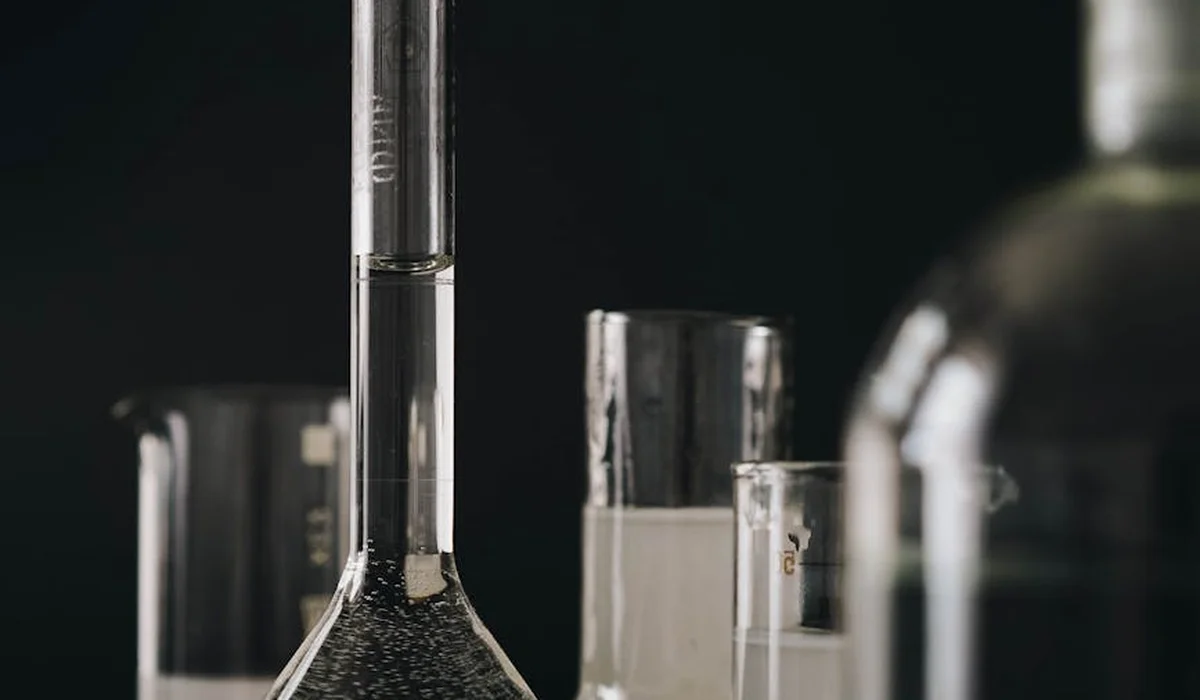
- Water Test Kit: Testing your water before and after a change tells you exactly what you’re removing and how effective you were. It turns guesswork into a science.
For those who want to be extra precise, a few optional items can elevate your routine.
- Thermometer: Use a simple aquarium thermometer to match the temperature of your new water to the tank water. This prevents temperature shock in your fish.
- Jug or Pitcher: A small jug is perfect for gently pouring the new water into the tank without disturbing your aquascape or stressing bottom-dwellers like my Corydoras, Shadow.
The Step-by-Step Process for a Safe Partial Water Change
Following a calm, methodical routine is the secret to a water change that keeps your fish happy and healthy.
- Prepare Your Replacement Water. This is your most critical step. Fill a clean bucket with water and treat it with a dechlorinator, matching the temperature to your tank. Never skip this.
- Power Down Equipment. Switch off your heater and filter. This prevents equipment from burning out if the water level drops below their safe operating line.
- Siphon and Clean. Use a gravel vacuum to siphon out the old water. Guide the siphon tube through the substrate to remove fish waste and leftover food.
- Add New Water Slowly. Pour the fresh, treated water into the tank gently. I often use a clean bowl or pour it onto a floating plate to avoid disturbing the substrate and startling the fish.
- Restart and Observe. Turn your heater and filter back on. Spend a few minutes watching your fish to ensure they are acting normally and not showing signs of stress.
Move slowly and deliberately around the tank to avoid casting sudden shadows or causing vibrations that can panic your aquatic pets. My feisty betta, Captain Fin, used to hide every water change day until I learned to work with quiet, predictable movements.
Preparing Your Replacement Water
Getting your new water right before it ever touches the tank is non-negotiable for fish health.
Temperature shock is a real danger. I always test the new water’s temperature against the tank water with a reliable thermometer, aiming for a difference of no more than one or two degrees. Your hand is not a good enough gauge.
Dechlorinator is your best friend. Follow the bottle’s instructions precisely for the volume of new water you are adding. An accurate, small measuring spoon dedicated to your fish room eliminates dangerous guesswork.
If you must let your prepared water sit for more than an hour before using it, give it a good stir or use a small air stone. Stagnant water can lose its dissolved oxygen, which isn’t ideal for your tank’s ecosystem.
Using a Siphon and Gravel Vacuum
Mastering the siphon is what separates a novice from a seasoned aquarist. To start the flow, I quickly submerge the entire tube to fill it with water, place one end in the bucket, and then give the gravel end a swift up-and-down motion in the tank. This is one of the essential steps in setting up your first fish tank. A step-by-step guide will walk you through cycling, water preparation, and routine maintenance.
When cleaning the gravel, push the wide vacuum tube about an inch into the substrate and then pull it back out. This “plunge and release” action pulls debris out of the gravel while letting the heavier stones fall back into place, preserving your aquascape. Unlike cleaning aquarium rocks and stones, this method targets finer debris within the substrate.
You can control the suction strength by pinching the hose or adjusting the flow valve on some models. Use a gentler flow over fine sand to avoid sucking it all up, and a stronger pull for coarse gravel that traps more gunk. My corydoras, Shadow, appreciates when I don’t vacuum his entire favorite hiding spot into the bucket.
How Much and How Often Should You Change the Water?
There isn’t one magic schedule that fits every single aquarium. Your tank’s needs are as unique as the fish swimming in it. The three biggest factors that dictate your water change schedule are your tank’s total volume, the number and type of fish you keep, and the hard data from your water test kit.
A heavily stocked 20-gallon cichlid tank will need far more frequent attention than a lightly stocked 75-gallon community tank. Think of it like a room: a small, crowded room gets stuffy much faster than a large, sparsely furnished one.
General Guidelines for Most Aquariums
For a typical, well-established community aquarium, a good rule of thumb is to perform a partial water change once a week. If you notice cloudy water, a noticeable odor, or elevated ammonia, nitrite, or nitrate levels in your tests, those are common signs that your aquarium may need a water change. Keeping an eye on these indicators helps you decide when it’s time to change water.
- A 10-15% water change is perfect for a stable, mature tank with a light to moderate fish load.
- A 20-25% water change is better for a newer tank or one that is more heavily stocked.
- Changing more than 50% of the water at once is risky and can shock your fish by altering water parameters too quickly.
Tailoring for Specific Setups
Your specific setup calls for a customized approach. I adjust my own routines based on who is living in the tank.
- Betta Tanks (under 10 gallons): Small volumes get dirty fast. For my betta, Captain Fin, in his 5-gallon tank, I do a consistent 20% water change every single week. This keeps the water crystal clear and prevents any buildup of waste.
- 10-Gallon Community Tanks: This is a popular starter size, but it’s a delicate balance. With a small group of fish like tetras and a corydoras, a 25% weekly change is my go-to. It’s enough to reset the system without being overly disruptive.
- Goldfish Tanks: Goldies like my Oranda are famously messy. They require a much more rigorous schedule. For a single fancy goldfish, I recommend a 30-40% water change every week. For common goldfish, you might need to do this twice a week.
The Critical Link to Feeding and Nitrates
The single best thing you can do to reduce your water change frequency is to avoid overfeeding. Uneaten food decomposes rapidly, spiking ammonia and nitrate levels and fueling algae growth like crazy. Your fish’s belly should look slightly rounded, not bulging, after a meal.
Your liquid test kit is your best friend here. Nitrate is your final indicator that a water change is due. While you never want to see ammonia or nitrite, a small amount of nitrate is normal.
- Aim to keep nitrates below 20 parts per million (ppm) for most community fish.
- For more sensitive species like discus or shrimp, you’ll want to keep nitrates below 10 ppm.
- If your test shows nitrates climbing toward 40 ppm, it’s definitely time for a water change, and you might need to increase the percentage you change or do it more often.
Matching Water Parameters for a Smooth Transition
Getting the water right is like making a comfortable bed for your fish-it needs to feel familiar and safe. Focus on temperature first because even a slight mismatch can send fish into shock, much like us stepping into an icy shower unexpectedly. I use a digital thermometer for both the tank and new water, aiming to keep them within one degree of each other; for tropical friends like Captain Fin, that’s around 78-80°F. This approach is the foundation of a complete aquarium temperature control guide for stable water. With reliable heaters, precise thermostats, and regular checks, you can maintain a constant, safe temperature for your aquatic companions.
pH and hardness are next on your checklist. pH swings can irritate fish skin and gills, while hardness (GH and KH) affects their ability to osmoregulate. Stable parameters prevent stress-in my tanks, I’ve seen pH stability reduce fin nipping and hiding behavior in sensitive species. Test your tap water’s baseline; for example, Goldie’s goldfish tank stays happy at pH 7.2-7.6, while Shadow’s corydoras prefer 6.8-7.2.
Before any water change, grab your liquid test kit to check ammonia, nitrite, and nitrate. These readings reveal your tank’s hidden health story-ammonia and nitrite should always read zero, while nitrate under 20 ppm keeps algae at bay. Here’s my simple routine:
- Collect a small water sample in the test vial, wiping it clean first.
- Add drops from each bottle, cap it, and gently shake-no vigorous motions!
- Wait the full time listed (often 5 minutes) for colors to develop accurately.
- Hold the vial against a white background to compare hues on the chart.
Introduce new water slowly to avoid parameter spikes. I pour it over a clean bowl or use airline tubing for a drip method, adding just a cup per minute to mimic gentle rain. This gradual approach lets fish like Shadow acclimate without panic-I’ve watched him explore faster when changes are eased in.
Tap water is a silent threat without dechlorinator. Chlorine kills beneficial bacteria and burns gills, while chloramine lingers longer. Always dose dechlorinator into your replacement water first-I swirl it in and wait a minute until that chemical smell fades. For extra safety, I choose a brand that handles heavy metals, since my tap sometimes carries copper traces.
Troubleshooting Common Water Change Challenges
It’s normal to see your fish act a little different right after a water change. Captain Fin, my betta, used to hide behind the heater for an hour. This temporary shyness is often just a reaction to the slight shift in their environment, not a sign of disaster. Knowing what’s normal before and after a water change helps you spot issues. If unusual behavior lasts beyond a day, test the water and adjust. Give them a few hours to settle before you worry.
Calming Stressed Fish After a Change
If your fish seem extra stressed, like Goldie frantically swimming or Shadow refusing to come out, check two things. Recognizing the most common signs of stress in aquarium fish can help you spot problems early. Look for behavior changes such as frantic swimming, hiding, flashing, clamped fins, or a sudden loss of appetite. First, ensure the new water’s temperature matched the tank water perfectly. Even a two-degree difference can shock them. Second, did you remember the water conditioner? Always treat tap water with a quality dechlorinator before it ever touches your tank; this is non-negotiable for fish health.
Stopping Parameter Swings Before They Start
Large, infrequent water changes can cause pH and hardness to bounce around, stressing your entire ecosystem. I combat this by changing smaller amounts more often. Instead of a stressful 50% change once a month, I do a gentle 15-20% change every single week. Smaller, consistent water changes are the secret to a truly stable and healthy aquarium. This method dilutes waste gradually without shocking the system, helping to maintain proper water parameters.
Your Post-Change Observation Checklist
After I finish a water change, I sit with the tank for ten minutes. I’m not just admiring my work; I’m conducting a health check.
- Count all your fish. Is everyone accounted for and swimming normally?
- Watch their gills. Breathing should be steady and calm, not rapid.
- Look for clamped fins (fins held tight to the body), a classic sign of stress or illness.
- Note their appetite. A fish that refuses food at the next feeding needs a closer look.
Your most powerful tool isn’t a test kit; it’s your own focused observation of daily fish behavior.
Keeping Your Equipment Clean and Safe
That gravel vacuum and water-change hose can become a hidden source of problems if you don’t clean them. After every use, I rinse my siphon and tubing with hot water. Once a month, I give them a soak in a solution of one part vinegar to four parts water to dissolve any mineral buildup, followed by a very thorough rinse. That same careful cleaning applies to clean vacuum aquarium gravel effectively: when you vacuum, slowly run the siphon through the substrate to lift and remove loose debris without churning the gravel. Regular gravel-vacuuming, done with the methods above, helps keep the substrate clean and your tank water clearer. Never use soap or chemical cleaners on any equipment that goes in your tank, as the residue can be lethal to fish. Let everything air-dry completely before storing it away.
FAQs
Why should I choose a partial water change over a full one?
Partial water changes help maintain stable water parameters and preserve beneficial bacteria in your filter and substrate, which are crucial for a healthy aquarium ecosystem. Full water changes can cause sudden shifts in temperature and chemistry, leading to fish stress or shock. Consistent partial changes are safer and more effective for long-term tank stability.
What’s the best way to do a partial water change in a betta tank?
For betta tanks, use a gentle siphon to remove 15-20% of the water weekly, avoiding strong currents that can stress these sensitive fish. Using a proper fish tank siphon makes a clean, controlled water change easier and more consistent. When adding new water, pour it slowly over a clean bowl or plate to minimize disturbance. Always match the temperature and treat the water with a dechlorinator to ensure a smooth transition.
How often should I change the water in a 10-gallon aquarium?
In a standard 10-gallon tank, aim for a 20-25% water change every week to manage waste buildup and keep nitrate levels low. Adjust the frequency based on your fish load and regular water testing; heavily stocked tanks may need more frequent changes. This routine helps prevent parameter swings and supports a balanced environment.
Is it safe to use tap water for partial water changes?
Tap water must always be treated with a dechlorinator before adding it to your aquarium to neutralize harmful chlorine and chloramines. These chemicals can damage fish gills and kill beneficial bacteria, leading to health issues. Allow the treated water to sit briefly and match the tank temperature for a safe, stress-free addition.
Your Path to Pristine Water
Remember, the two pillars of a successful water change are always treating new water with a quality dechlorinator and ensuring its temperature closely matches your tank. Following these steps consistently protects your fish from shock and keeps your aquatic ecosystem beautifully balanced.
The most rewarding aquariums are maintained by keepers who view each routine task as a chance to learn and observe. Stay curious, connect with fellow hobbyists, and your dedication will be reflected in the vibrant health of your underwater world.
Further Reading & Sources
- Beginner: Partial Water Changes(
- How to Do a Water Change in a Freshwater Aquarium Safely
- Performing Partial Water Changes – GloFish®
- Water Changes
- How to do a Partial Water Change in a Fish Tank?
Lia is an expert in aquarium and pet fish care. Having worked in the marine industry and having cared for multiple pet fish, she has acquired first hand expertise on aquarium care, maintenance and setup. She always brings her practical expertise and science to help solve any aquarium related queries.
Water Changes