Reef Tank Setup Demystified: Your Blueprint for a Thriving Marine Ecosystem
Hello fellow aquarists! That urge to bring a slice of the ocean into your home is exciting, but the technical details of a reef tank can feel intimidating. This guide breaks it all down into simple, manageable steps so you can build your aquatic masterpiece with confidence.
We will walk through the entire process together, covering:
- Selecting the ideal tank size and essential equipment
- Mastering the critical balance of water chemistry
- Cycling your tank to establish a healthy biological filter
- Choosing hardy, compatible fish and corals for a stable environment
- Creating a simple and effective long-term maintenance routine
I’ve spent years successfully running complex planted systems and breeding sensitive fish, giving me the hands-on knowledge to help you avoid common pitfalls.
Planning Your First Saltwater Aquarium
Selecting the Perfect Tank Size
Your first big decision is the tank itself, and I always advise beginners to go as large as their space and budget allow. A larger volume of water, like a 40-gallon breeder or a 75-gallon tank, is much more forgiving of small mistakes in water chemistry than a tiny 10-gallon setup. Think of it like a large room versus a small closet; a single spill in the closet affects everything, while the large room barely notices. Also, different fish species require different amounts of space. Size the tank to your species’ adult size and swimming needs.
For a fish-only-with-live-rock (FOWLR) system, a 55-gallon tank is a solid starting point. Many fish keep 55-gallon aquariums as a common entry point because they offer a solid balance of volume and footprint. It’s large enough to support a varied community yet manageable for many homes. If your heart is set on a reef tank with delicate corals, I suggest a minimum of 75 gallons to provide stable parameters and more room for coral growth. Starting with a larger tank from day one saves you the cost and hassle of upgrading later when you inevitably get hooked on the hobby.
Finding the Ideal Location
Where you place your aquarium is a permanent decision, so choose wisely. You need to find a spot that supports the tank’s immense weight-a filled 75-gallon tank can weigh over 850 pounds. Always place your aquarium on a stand designed for its specific weight and size, and ensure it’s on a load-bearing wall for ultimate safety.
Beyond structure, consider the environment. Avoid direct sunlight from windows, which causes uncontrollable algae blooms and temperature swings. Make sure you have easy access to electrical outlets for all your equipment. You’ll thank yourself later for choosing a location where performing weekly maintenance is a simple, uncomplicated task.
Gathering Your Reef Tank Equipment
The Core Filtration System
Filtration is the life support system of your aquarium, and a reef tank relies on a three-stage approach working in harmony. When considering which types of aquarium filters are best, understanding how each type contributes matters. In the following overview, we compare common filter options and their strengths for reef tanks.
- Mechanical Filtration: This is the first line of defense. Filter socks or filter floss physically trap floating debris like fish waste and uneaten food. I change my filter floss every three days to keep the water crystal clear.
- Biological Filtration: This is the heart of the system. Live rock and porous ceramic media in your sump provide surface area for beneficial bacteria. These bacteria are the true workhorses, converting toxic ammonia into less harmful nitrate.
- Chemical Filtration: Activated carbon and phosphate-removing media polish the water. They pull out dissolved organics and impurities that can yellow the water and fuel nuisance algae.
Creating Water Flow with Powerheads
Stagnant water is a reef tank’s enemy. Corals and other marine life evolved in turbulent oceans, and they need simulated currents to thrive. Powerheads, or wavemakers, create this essential, random flow that delivers food and oxygen to your corals while carrying waste away.
Aim for a total flow rate of 20 to 50 times your tank’s volume per hour. For a 75-gallon tank, that’s 1,500 to 3,750 gallons per hour. I use two powerheads placed on opposite sides of the tank, programmed to create a chaotic, surging motion. This varied flow prevents detritus from settling in dead zones and makes your coral polyps dance beautifully.
Lighting Your Underwater World
Reef tank lighting is a complex but fascinating topic. The light spectrum and intensity directly dictate what kind of corals you can keep. For beginners, a quick Guide to understanding PAR spectrum makes choosing and tuning lights much easier. This beginner-friendly overview of the aquarium light PAR spectrum helps you get started with confidence.
- Soft Corals and LPS: For beginner-friendly corals like mushrooms, zoanthids, and hammer corals, moderate LED lighting is perfect. They need less intense light to photosynthesize.
- SPS Corals: For the vibrant, branching Small Polyp Stony corals like Acropora, you need high-output LEDs or T5 hybrids. These corals are light-hungry and demand specific blue and white spectrums to display their stunning colors and grow their skeletons.
Most modern LED lights come with programmable timers that can simulate a natural sunrise, midday peak, and sunset. This gradual ramp-up and down reduces stress on your fish and creates a more natural daily cycle for your entire ecosystem.
The Step-by-Step Reef Tank Setup
Step 1: Preparing and Adding Your Substrate
Begin by choosing a reef-safe substrate like aragonite sand, which buffers your water’s pH naturally. I always rinse the sand in a bucket with fresh RO/DI water until it runs clear to prevent cloudiness. A 2-inch deep sandbed is my go-to for stability and providing a home for beneficial bacteria. Pour the substrate gently into your dry tank to avoid scratching the glass. For a 50-gallon tank, you’ll need about 40-50 pounds of sand to achieve that depth.
- Select fine or coarse aragonite based on your tank’s inhabitants-fine sand is better for burrowing creatures.
- Rinse thoroughly to remove dust; cloudy water can stress new marine life.
- Spread evenly across the bottom, sloping it slightly toward the front for a natural look.
Step 2: Aquascaping with Live Rock
Live rock is the backbone of your reef, offering surface area for bacteria and creating hiding spots. Arrange rocks to form caves and ledges, leaving open spaces for water flow. I cure live rock in a separate container for a few weeks to avoid ammonia spikes, but if you buy pre-cured rock, you can place it directly. The earthy scent and rough texture tell you it’s teeming with life. Position rocks securely to prevent collapses-this is where I use aquarium-safe epoxy for stability.
- Start with the largest rocks as a base, building upward for height.
- Create overhangs and tunnels to mimic natural reefs and reduce fish aggression.
- Leave at least 2-3 inches between rocks and the glass for easy cleaning.
Step 3: Mixing and Adding Saltwater
Use reverse osmosis deionized (RO/DI) water and a high-quality marine salt mix for consistency. Mix in a clean container with a powerhead for at least 4-6 hours until fully dissolved. Always check the specific gravity with a refractometer-aim for 1.024 to 1.026 at 78°F for most marine species. I match the temperature of the new water to your tank’s temp before slowly adding it to avoid shocking the system. For a 75-gallon tank, you might mix 20 gallons at a time to handle the volume easily.
- Test salinity after mixing; adjustments are easier before adding to the tank.
- Pour water over a plate or your hand to prevent disturbing the substrate.
- Fill the tank until it’s about 80% full, leaving room for equipment and rock displacement.
Step 4: Installing and Starting Equipment
Set up your protein skimmer, powerheads, heater, and lighting system now. Position powerheads to create random flow patterns, reducing dead spots where detritus builds up. I run equipment for 24 hours without livestock to check for leaks, noise, or temperature swings. The hum of a well-tuned filter and the gentle shimmer from LED lights signal a healthy start. Set your heater to maintain 78-80°F, and use a timer for lights to simulate a natural day-night cycle.
- Install the protein skimmer in the sump or hang-on-back model for efficient waste removal.
- Angle powerheads toward the surface to improve oxygen exchange and surface agitation.
- Calibrate heaters with a separate thermometer to avoid inaccurate readings.
Initiating the Reef Tank Cycle
Testing Your Water Parameters
Cycle your tank by introducing an ammonia source, like a small piece of raw shrimp or liquid ammonia, to kickstart beneficial bacteria. Understanding the nitrogen cycle is essential when cycling a new aquarium. This is the cycle explained: ammonia to nitrite to nitrate. Test water every 2-3 days using a reliable kit. You’ll see ammonia rise first, then nitrite, and finally nitrate-this process can take 4-8 weeks, so patience is key. I keep a logbook to track levels; it helps spot trends and prevents rushed additions of fish. Ideal ranges: ammonia 0 ppm, nitrite 0 ppm, nitrate below 10 ppm for a reef tank.
| Parameter | Target Range | Testing Frequency |
|---|---|---|
| Ammonia | 0 ppm | Every 2 days during cycle |
| Nitrite | 0 ppm | Every 2 days during cycle |
| Nitrate | < 10 ppm | Weekly after cycle |
| pH | 8.1-8.4 | Weekly |
Understanding Calcium, Alkalinity, and Magnesium
These elements are vital for coral growth and skeletal development in invertebrates. Calcium should be 380-450 ppm, alkalinity 8-12 dKH, and magnesium 1250-1350 ppm. I test these weekly with a quality test kit and adjust using supplements like calcium chloride or kalkwasser. Low magnesium can cause calcium and alkalinity to drop rapidly, so I always balance magnesium first. The clarity of the water and vibrant coral colors depend on stable levels-think of it as the trio that supports your reef’s health.
- Use two-part additives for calcium and alkalinity to maintain balance without precipitation.
- Test magnesium monthly; it acts as a buffer for the other two parameters.
- DIY hack: Crushed coral in a media bag can help slowly replenish calcium in smaller tanks.
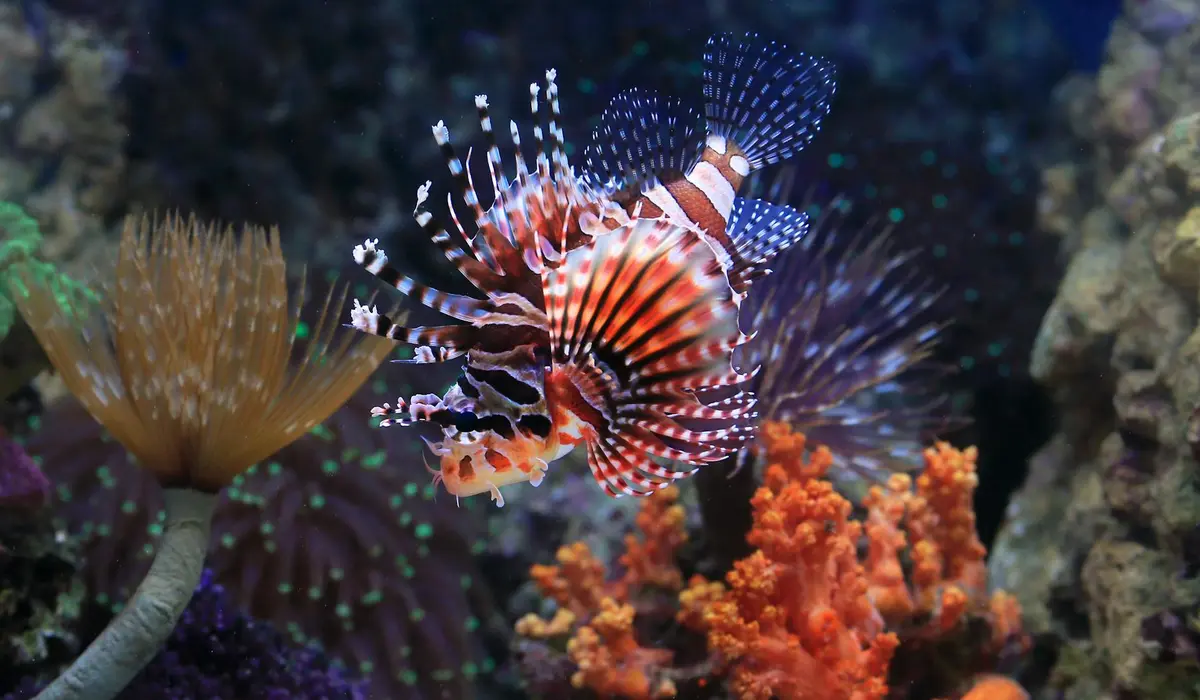
Introducing Corals and Marine Life

Quarantining New Arrivals
I never add a new fish or coral directly to my main display tank. This is the single most effective habit I’ve adopted to prevent disasters. A separate quarantine tank, running for at least four weeks, is your best defense against invisible parasites and disease. Proper quarantine is how you prevent disease from entering your system. It buys you time to observe and treat any issues before they reach the display tank. You only need a simple setup: a small tank, a heater, and a sponge filter that’s been seeded with bacteria from your main system.
Watch new fish closely during this period for any signs of flashing, rapid breathing, or spots. For corals, I inspect them under blue LED lights to spot pests like asterina stars or dreaded montipora-eating nudibranchs. A quick dip in a coral-safe solution right after unpacking them can neutralize many common hitchhikers.
Safe Acclimation Procedures
The journey from the bag to your tank is incredibly stressful for marine life. The drip acclimation method is the gentlest way to help them adjust to your specific water chemistry. Use it whenever you’re introducing new specimens—especially after shipping or if your tank’s parameters differ from the bag’s water.
- Float the sealed bag in your sump or tank to equalize the temperature for about 15 minutes.
- Carefully open the bag and place the entire thing inside a clean bucket.
- Use airline tubing and a control valve to start a siphon from your display tank to the bucket. Tie a loose knot in the tube to slow the flow to 2-4 drips per second.
- Let this drip for 60-90 minutes, which slowly mixes the waters and allows the animal to adjust to new pH, salinity, and other parameters.
- After the time is up, gently net the fish or remove the coral and place it in the display tank. Discard the original shipping water in the bucket.
Watching a coral’s polyps slowly extend for the first time under your lights is a reward for your patience. For more sensitive fish like wrasses, I sometimes dim the main tank lights for a few hours after introduction to reduce stress. A complete nighttime care guide explains when you should turn off the aquarium lights. It also covers how long to keep them off and how to mimic natural cycles with gradual dimming or moonlight settings.
Ongoing Reef Tank Maintenance
Performing Water Changes
Consistent water changes are the heartbeat of a stable reef. I perform a 10-15% water change every two weeks without fail. Mixing your new saltwater 24 hours in advance with a small powerhead ensures the salt is fully dissolved and the water is gas-equilibrated. This prevents chemical burns on delicate coral tissues.
Always match the temperature and salinity of the new water to your tank precisely. When siphoning out the old water, I run the hose over my rockwork and into the sand bed to vacuum out detritus. This simple act removes waste before it can break down and fuel nuisance algae.
Caring for Your Equipment
Your equipment is the life support system, and a little regular care prevents catastrophic failures. I have a simple monthly checklist.
- Pumps and Powerheads: Unplug and disassemble them to remove any algae or calcium buildup from the impellers. A soak in a 1:1 vinegar-water solution works wonders.
- Protein Skimmer: Clean the collection cup at least once a week and give the entire body a thorough cleaning every month to maintain peak foam production.
- Filter Media: Rinse mechanical filter socks or filter floss in old tank water during a water change. Never use tap water, as it will kill the beneficial bacteria.
- Heater: Wipe it down to prevent algae from insulating it, which can lead to overheating. Always keep a backup heater on hand.
The quiet, consistent hum of a clean pump is the sound of a healthy, low-stress aquarium. Setting calendar reminders for these tasks makes them a routine part of the hobby, not a chore.
FAQs
Can I use a canister filter for my reef tank setup?
Yes, canister filters are a viable option for reef tanks, particularly in smaller setups or where a sump isn’t feasible. They excel at mechanical and biological filtration but should be paired with a protein skimmer and powerheads to handle waste and water flow. Regular cleaning every few weeks is essential to prevent detritus buildup and maintain water quality.
Where can I find reef tank setups for sale?
Complete reef tank packages are available at specialty aquarium stores, online marketplaces, and through hobbyist groups on social media. Purchasing a pre-configured setup can simplify the process, but always verify that the equipment list includes reef-specific items like high-output lighting and a protein skimmer. Research reviews and seller reputations to ensure you’re getting a system suited for marine life. For used setups, consult a complete guide to buying used aquariums safely. It helps you inspect for leaks, verify equipment function, and compare total costs.
Is Reddit a good resource for reef tank setup advice?
Absolutely, Reddit communities such as r/ReefTank provide real-world experiences and troubleshooting tips from fellow aquarists. You can browse setup ideas, ask questions, and see photos of successful tanks for inspiration. Just remember to confirm any advice with trusted sources, as individual experiences may vary based on tank conditions.
What should I consider when choosing a reef tank return pump?
Select a return pump that matches your tank’s volume and sump design, aiming for a flow rate of 5-10 times the display tank’s gallons per hour. It should be energy-efficient, quiet, and preferably adjustable to fine-tune circulation. Properly sizing the return nozzle helps direct flow and reduce dead spots, supporting overall tank health.
Your Thriving Reef Awaits
Patience is your most valuable tool in this hobby, so take your time cycling the tank and slowly introducing new marine life. Focus on maintaining pristine, stable water conditions above all else, as this is the true foundation of a healthy reef ecosystem.
Remember that you are creating a complex, living world, and your commitment to its care is what allows it to flourish. Stay curious, keep learning from fellow hobbyists, and enjoy the incredible journey of building your own slice of the ocean.
Further Reading & Sources
- The Best Guide for Starting a Reef Tank | Reef Builders | The Reef and Saltwater Aquarium Blog
- Reef Tank Aquarium Setup Guide
- Aquarium Set-up: Step-by-step Guide to Creating a Reef Aquarium
- The Supreme Guide To Setting Up A Saltwater Reef Aquarium | Reef2Reef
- Ultimate Reef Aquarium Setup Guide (2023 Edition) – Hackers’ Reef
Lia is an expert in aquarium and pet fish care. Having worked in the marine industry and having cared for multiple pet fish, she has acquired first hand expertise on aquarium care, maintenance and setup. She always brings her practical expertise and science to help solve any aquarium related queries.
Reef Tanks