Aquarium Lighting Setup: Your Blueprint for a Thriving Tank
Hello fellow aquarists. You’re not just screwing in a bulb; you’re setting the sun for an entire underwater world. Getting the lighting right is the single biggest factor that separates a murky, algae-ridden tank from a crystal-clear, vibrant ecosystem.
This complete guide will walk you through everything, from the basic science to the advanced tricks I use in my own tanks. We will cover:
- The different types of aquarium lights and which one is a true value for your setup.
- How to calculate the perfect light intensity so your plants grow but algae doesn’t.
- Setting a fail-proof lighting schedule that keeps your fish stress-free.
- Advanced color spectrum choices to make the colors of your fish truly pop.
- Troubleshooting common problems like green water and spot algae on the glass.
I’ve fine-tuned the lighting on dozens of high-tech planted and breeding tanks, and I’m here to help you get it perfect on the first try.
Understanding Aquarium Lighting Basics
Why Light Spectrum and Intensity Matter
Think of light spectrum as the color recipe for your tank’s health. A light with a high Kelvin rating, like 6500K to 8000K, gives off a crisp, daylight-white glow that makes red plants pop and fish colors look vibrant. I always recommend a full-spectrum LED that mimics natural sunlight because it supports photosynthesis without looking artificial.
Intensity, measured in PAR (Photosynthetically Active Radiation), is the raw power your plants or corals receive. Too little, and your plants will become leggy and pale. Too much, and you’ll be battling algae on every surface. Low-light plants like Anubias thrive with a PAR of 30-50, while a carpeting plant like Dwarf Hairgrass might demand a PAR of 80+ to spread.
The Role of Photoperiod in Algae Control
Photoperiod is just a fancy word for your daily light schedule, and it’s your secret weapon against green water and fuzzy algae. Algae are opportunistic; they explode when lights are on for unpredictable, long periods. Setting a consistent photoperiod of 6 to 8 hours is the single most effective way to starve out nuisance algae while keeping your plants happy.
In my own heavily planted tank, I run my lights for 7 hours straight with no siesta. I’ve found this consistency prevents the pH swings that can stress fish. An inexpensive digital timer is non-negotiable-it automates this routine perfectly, so you never have to remember to flip the switch.
Choosing the Right Aquarium Lighting
LED Lighting Options for Different Tanks
The LED market is vast, but you can narrow it down by your tank’s main purpose. Here’s a quick guide based on what I’ve used over the years:
- Low-Tech Planted Tanks & Fish-Only Tanks: Basic full-spectrum LED strips are perfect. They’re affordable, energy-efficient, and provide plenty of light for viewing and easy-going plants like Java Fern.
- High-Tech Planted Tanks: You need an LED fixture with high PAR output and often customizable color channels. Brands like Chihiros and Fluval Plant Spectrum allow you to fine-tune the red and blue peaks for explosive plant growth.
- Reef Tanks: This is the big league. Reef LEDs must produce intense, actinic blue light (around 420-460nm) to support coral photosynthesis and make their fluorescent colors glow.
Don’t get sucked into buying a reef light for a low-tech planted tank; the intense blues will just fuel an algae farm instead of a beautiful aquascape.
Matching Light Intensity to Your Aquarium’s Needs
Getting the intensity right is about balancing your tank’s inhabitants and your own maintenance appetite. A simple chart can help you visualize the needs:
| Tank Type | Recommended Light Intensity | What It Supports |
|---|---|---|
| Fish-Only / Low-Light Plants | Low (10-30 PAR) | Fish viewing, Anubias, Java Fern, Cryptocoryne |
| Medium-Light Planted | Medium (30-50 PAR) | Most stem plants, Swords, Vallisneria |
| High-Light Planted / Reef | High (50+ PAR) | Red plants, carpeting plants, demanding corals |
If you see algae forming on the glass in just a couple of days, your light intensity is almost certainly too high for your plant mass and nutrient levels. Start by reducing the photoperiod by an hour, and if that doesn’t work, look into raising the light fixture or dimming it if possible. It’s all about finding that sweet spot where your plants are growing but the algae can’t get a foothold.
Installing and Mounting Your Lights
Step-by-Step Mounting Guide
Let’s get your lights up and running safely. I always start by unboxing everything on a clean, dry surface to avoid any accidents.
- Check all components: light unit, mounting legs or hanging kit, power adapter, and any screws. Make sure nothing is missing or damaged before you begin.
- If using mounting legs, attach them to the light bar according to the manufacturer’s instructions. For rimless tanks, I often use adjustable legs that grip the glass edges without slipping.
- Gently place the light on top of your aquarium, ensuring it’s centered and stable. Double-check that the light is secure and won’t accidentally fall into the water, which could cause electrical hazards or stress your fish.
- For hanging kits, measure the distance from the ceiling or stand to achieve the right height. Use a level to keep it straight, and tighten all connections to prevent swaying.
- Route the power cord away from water sources and use drip loops to divert moisture. I like to tuck cords behind the tank stand for a tidy look and added safety.
- Plug in the light for a quick test. Look for even illumination and listen for any unusual sounds. If it’s an LED, check that all diodes are working-sometimes one can be faulty out of the box.
Ensuring Proper Coverage and Placement
Getting the placement right prevents dark spots and supports healthy plant and fish life. The goal is to mimic natural sunlight without creating harsh shadows.
Measure your tank’s length and width to match the light’s spread. For a standard 20-gallon long tank, a light that covers 24 inches in length will usually provide full coverage from front to back. If you have a deeper tank, like a 30-gallon, you might need a stronger light or multiple units to reach the substrate.
- Height matters: Position lights 6-12 inches above the water surface for most setups. Too close, and you risk overheating or algae blooms; too far, and plants won’t get enough intensity.
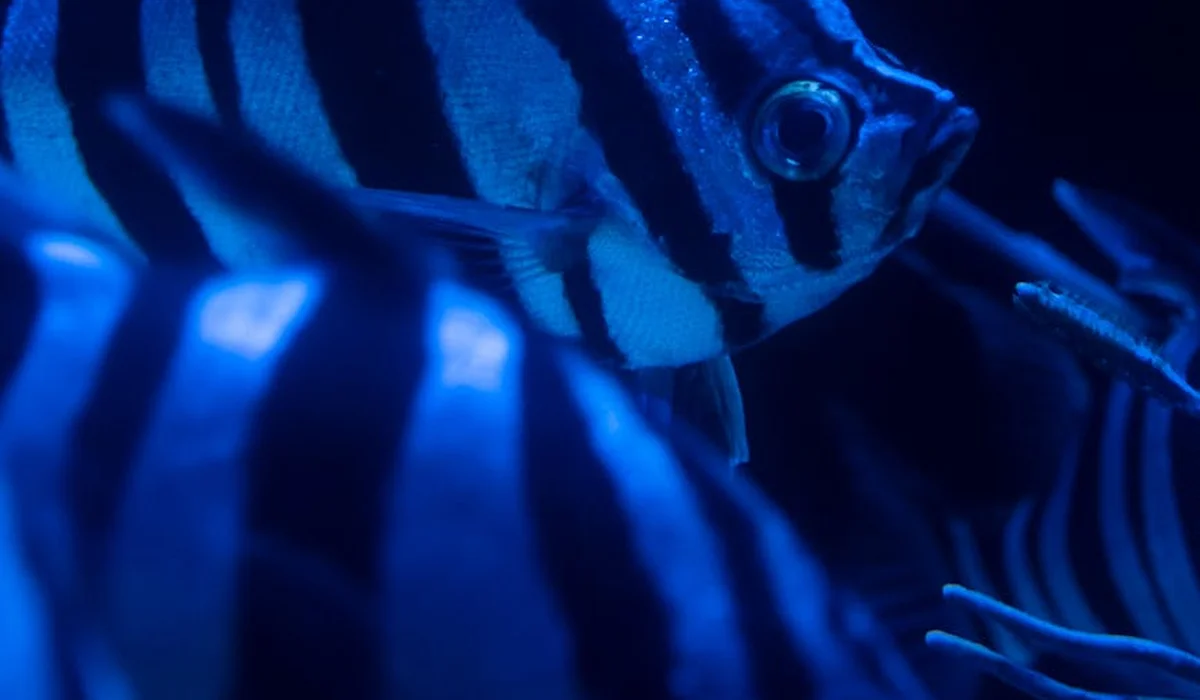
- Angle the light slightly if using a single unit to reduce shadows in corners. In my planted tank, I angled it toward the back to highlight the driftwood and give Captain Fin’s blue scales a beautiful shimmer.
- Use a PAR meter or the manufacturer’s guidelines to check light intensity at different depths. Low-light plants like Java Fern thrive with less, while high-light carpeting plants need more direct exposure.
Avoid placing lights directly over open water without hardscape or plants, as this can encourage algae. I’ve found that spreading the light evenly across the tank’s surface reduces stress on bottom-dwellers like Shadow, who prefer dimmer areas to explore. If you have a tall tank, consider pendant lights that can be adjusted for deeper penetration.
Setting Up Lighting Schedules and Controls
How to Use Timers and Dimmers
Automating your lights with timers and dimmers saves you time and keeps your tank’s environment stable. It’s one of the best investments for busy aquarists.
Plug your light into a digital timer and set it for consistent on/off times. I use a simple outlet timer from the hardware store-it’s affordable and prevents me from forgetting to turn lights off, which can disrupt fish sleep cycles. For smart controls, Wi-Fi timers let you adjust schedules from your phone, great for when you’re away from home.
- Dimmers allow you to gradually increase or decrease light intensity. This mimics sunrise and sunset, reducing stress for sensitive fish like bettas.
- Start with low dimmer settings and slowly ramp up over a week when introducing new lights. Sudden changes can shock plants and cause algae outbreaks.
- Combine timers with dimmers for a seamless transition. For example, set the dimmer to fade in over 30 minutes in the morning, simulating a natural dawn.
Test your setup by observing fish behavior. If Goldie starts hiding when lights come on, the intensity might be too high. Adjusting the dimmer to a softer glow can make them feel more secure and encourage natural foraging habits.
Creating a Balanced Photoperiod
A photoperiod is the daily length of time your lights are on, and balancing it is key to a thriving aquarium. Too much light fuels algae; too little stunts plant growth.
Aim for 8-10 hours of light per day for most planted freshwater tanks. Many hobbyists ask how long aquarium lights should stay on for both fish and plants. The answer varies, but balancing plant needs with fish comfort and algae risk is key. I run my lights for 9 hours with a 1-hour ramp-up and down using a dimmer, which keeps my plants lush without green water issues. For fish-only tanks, 6-8 hours is often sufficient, as it reduces stress and mimics their natural habitat.
- Split the photoperiod if needed: 4 hours on, 4 hours off, then 4 hours on again. This “siesta” period can help control algae by interrupting their growth cycle.
- Match the schedule to your room’s natural light. If your tank gets indirect sunlight, shorten the artificial photoperiod to avoid over-lighting.
- Seasonal adjustments: In winter, I reduce the photoperiod to 7 hours to simulate shorter days, which can trigger breeding in some species.
Monitor your tank’s response over the first few weeks. If you notice algae forming on the glass or plants, shorten the photoperiod by 30 minutes and see if it improves within a week. For high-tech tanks with CO2 injection, align the photoperiod with CO2 levels to maximize plant photosynthesis and minimize waste.
Troubleshooting Common Lighting Issues
Dealing with Algae Blooms
Seeing your tank turn green can feel discouraging, but it’s a sign your lighting needs a tweak. Algae thrives when there’s an imbalance of light and nutrients. The most common fix is simply reducing your photoperiod. If you’re wondering why my fish tank water is turning green, it’s typically an algae bloom caused by excess light or nutrients. The fix is to reduce light exposure and balance nutrients, along with regular water changes.
I start by cutting my light-on time down to just six hours a day for a week or two, and I’m always amazed at the difference it makes. You can also look into getting a timer, which automates this process and gives your plants and fish a consistent daily cycle.
Beyond duration, consider the intensity and spectrum of your light. An old, fading bulb might be emitting a spectrum that disproportionately encourages algae. Here are the main culprits and quick solutions:
- Too Much Light: Reduce your photoperiod to 6-8 hours. Use a timer for consistency.
- Nutrient Imbalance: High nitrates or phosphates feed algae. Increase your water change frequency.
- Old Bulbs: As bulbs age, their spectrum shifts. Replace fluorescent or metal halide bulbs annually.
- Wrong Spectrum: Some algae love warm, yellow light. A light with more in the 6500K-8000K (daylight) range is better for plants and worse for algae.
Fixing Flickering or Dim Lights
A flickering light is more than just an annoyance; it stresses your fish and signals a failing component. The hum of a healthy filter should be your background noise, not the sputter of a dying light.
For LED units, flickering almost always points to a power supply issue or a loose connection in the wiring. Check all the cables are plugged in securely at both the light and the wall. If it’s an older fluorescent tube, the starter or the ballast is likely the culprit and needs replacing.
When your lights seem dimmer than they used to be, it’s a slow fade you might not notice day-to-day. This is a classic sign of an aging fluorescent or metal halide bulb. Their output degrades over time.
- Check Connections First: Unplug the unit and firmly reseat all power cords and connectors.
- Test the Power Supply: If you have a multimeter, you can check the output of your LED driver. A reading significantly below its rated voltage means it’s time for a new one.
- Replace the Bulbs: For non-LED fixtures, proactively replace bulbs every 10-12 months, even if they still light up, to ensure your plants get the intensity they need.
Lighting for Specific Aquarium Types
Freshwater Planted Tank Lighting
Lighting a planted tank is about fueling photosynthesis, not just showing off colors. You need to match your light’s power to the needs of your plants. Different aquarium plants require different amounts of light, so knowing each species’ light needs helps you dial in the right PAR. If you’re unsure, start with moderate light and observe growth. Low-light plants like Anubias or Java Fern are happy with around 15-30 PAR, while a carpet of Dwarf Hairgrass will demand 80+ PAR.
I always recommend an LED fixture with a customizable 24/7 cycle that mimics a natural sunrise and sunset; it reduces stress on the fish and makes the tank look incredible. The shimmer of scales under a slow-rising morning light is a beautiful sight.
Look for a color temperature around 6500K for a crisp, daylight effect that makes plant greens pop. If you have red plants, ensure your light has a strong output in the red spectrum to help them develop those deep, vibrant hues.
- Low-Tech Tanks: Use moderate lighting (15-50 PAR) to avoid algae and slow, steady growth.
- High-Tech Tanks: Invest in high-output LEDs (50+ PAR) to support demanding plants and CO2 injection.
- Photoperiod: Stick to 6-10 hours of light. Use a timer to prevent human error.
Coral Reef and Saltwater Lighting
Saltwater lighting is a different beast. This difference also shows up when you compare freshwater and saltwater setups—freshwater tanks often tolerate lower light levels and require different spectra geared toward plants and community fish. Corals host photosynthetic algae called zooxanthellae inside their tissues, and they are incredibly demanding about the light spectrum and intensity they receive. Soft corals are more forgiving, but Small Polyp Stony (SPS) corals need intense, penetrating light.
The key to reef lighting is providing a full spectrum that heavily emphasizes the blues and violets (Actinic lighting), which is what corals use most efficiently for growth and fluorescence. This is why a reef tank glows with such otherworldly colors.
Metal Halide was the old standard for its powerful penetration, but modern LED systems reign supreme for their controllability, low heat, and ability to create stunning dawn/dusk simulations. You’ll need to research the specific PAR requirements for each coral you keep.
- Soft/LPS Corals: Moderate lighting in the 50-150 PAR range is often sufficient.
- SPS Corals: Require very high-intensity light, often 200-400 PAR, to thrive.
- Lighting Schedule: A gradual ramp-up and ramp-down period is crucial to avoid shocking corals. A 10-12 hour total cycle with 8 hours at peak intensity is a good starting point.
Maintenance and Efficiency Tips

Keeping Your Lights in Top Shape
Think of your aquarium light like a window to your underwater world; keeping it clean ensures your fish and plants get the full benefit. I wipe down my light fixtures and glass covers every two weeks during a water change. A simple wipe with a vinegar-water solution on a soft cloth prevents mineral deposits and algae from blocking that precious light. To tackle algae on the glass itself, use a soft sponge or a dedicated aquarium algae scraper for a gentle, effective clean. Regular light scrubbing during routine maintenance helps keep the glass clear so your light can penetrate fully.
For the lights themselves, always unplug the unit and let it cool completely before you touch it. Moisture and electricity are a dangerous mix. Gently dust the LEDs or bulbs and check for any signs of condensation inside the housing, which can be a precursor to failure.
All light sources have a finite lifespan, even long-lasting LEDs. Their intensity slowly fades over time, a process called lumen depreciation. Plan to replace your LED unit or fluorescent tubes every 18 to 24 months to ensure your plants continue to receive the photosynthetic punch they need to thrive.
Maximizing Energy Efficiency
The single best investment for efficiency and plant health is an automatic timer. Plug your light into one, set it, and forget it. This creates a consistent day/night cycle that reduces stress for your fish and prevents you from accidentally leaving the lights on for 16 hours, which is a recipe for an algae explosion. Using a timer is a non-negotiable hack that protects your fish, your plants, and your electricity bill. To tie this into a broader resource, our complete guide on Should You Turn Off Your Aquarium Light at Night walks you through optimal lighting schedules. It covers how many hours of darkness your tank needs and how to adjust for plants and fish.
When it’s time for an upgrade, prioritize LED fixtures. They are the undisputed champions of the aquarium world. Compared to old fluorescent or metal halide lights, LEDs consume significantly less power, produce minimal heat, and last for years. So which light is best for your setup? We’ll compare LED, fluorescent, and halide to help you decide.
Consider your aquascape’s layout when positioning your light. Is your tank packed with tall plants that create shade? You might not need a blisteringly powerful light across the entire span. Positioning your light slightly off-center or focusing its output on high-light plant zones can save energy while still creating a dynamic, natural-looking environment. A light that is too strong for your setup doesn’t just waste electricity; it forces you into a constant battle with algae.
Here is a quick comparison of common light types:
| Light Type | Average Lifespan | Energy Use | Best For |
|---|---|---|---|
| LED | 50,000 hours | Low | All tank types, from beginner to high-tech planted |
| Fluorescent (T5/T8) | 12-18 months | Medium | Low-tech planted tanks and fish-only setups |
| Metal Halide | 12-18 months | Very High | Deep reef tanks with demanding corals |
FAQs
How can I simulate a natural sunrise and sunset in my aquarium?
Invest in a programmable LED light with dimming features to gradually increase intensity in the morning and decrease it in the evening. This creates a smooth transition that mimics natural light cycles, reducing stress for fish and promoting natural behaviors. For example, set a 30-minute ramp-up at dawn and a similar fade-out at dusk using a smart timer or app-controlled system.
What are some creative lighting ideas to make my aquarium stand out?
Use accent lighting, such as small, waterproof LED spots, to highlight specific hardscape elements like driftwood or unique rocks for a dramatic effect. You can also incorporate colored LEDs in blue or red tones during certain hours to enhance fish colors or create a themed ambiance. Positioning lights at varying heights or angles can add depth and shadows, making your aquascape appear more dynamic and visually engaging.
Can I use multiple light sources in my setup, and how should I arrange them?
Yes, using multiple lights can improve coverage in larger or irregularly shaped tanks, ensuring no areas are left in shadow. Place them to overlap slightly for even intensity, and consider using separate timers or dimmers to control different zones, such as one for foreground plants and another for background features. This setup is ideal for complex aquascapes or tanks with mixed inhabitants that have varying light needs.
Are there budget-friendly alternatives to commercial aquarium lights?
For low-tech setups, you can adapt household LED grow lights or full-spectrum desk lamps, but ensure they are safe from water splashes and provide adequate spectrum for plant health. For beginners, PAR stands for photosynthetically active radiation—the wavelengths plants use for growth. A basic understanding of the blue and red portions of the spectrum helps you choose fixtures and set a simple lighting schedule. Always check the light’s PAR output and color temperature to match your tank’s requirements, and use a timer to maintain a consistent schedule. However, purpose-built aquarium lights are generally more reliable and efficient for long-term success.
Your Aquarium Lighting Journey
Selecting the right light intensity and spectrum for your specific tank inhabitants, from low-light plants to color-enhancing fish, forms the foundation of a healthy setup. Always use a timer to maintain a consistent photoperiod, as this simple habit prevents algae blooms and keeps your fish stress-free by mimicking natural daylight rhythms.
Responsible fish keeping means observing how your pets and plants respond to your lighting choices and making adjustments to support their well-being. I encourage you to keep learning through communities and trusted resources, because the more you understand your aquarium’s unique needs, the more rewarding your hobby becomes.
Further Reading & Sources
- Aquarium Lighting Guide – Aquarium Gardens
- Guide to Aquarium Lighting: Beginner, Intermediate & Advanced – BRS Fresh
- The right light for your aquarium – Tropica Aquarium Plants
- How to Balance Aquarium Lights to Grow Healthy Plants (& Avoid Algae) – Aquarium Co-Op
- Aquarium Lighting Basics: the Case for LED Fixtures
Lia is an expert in aquarium and pet fish care. Having worked in the marine industry and having cared for multiple pet fish, she has acquired first hand expertise on aquarium care, maintenance and setup. She always brings her practical expertise and science to help solve any aquarium related queries.
Lighting Options